

Category Archives: Uncategorized
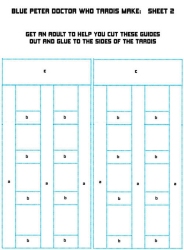
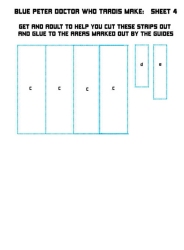
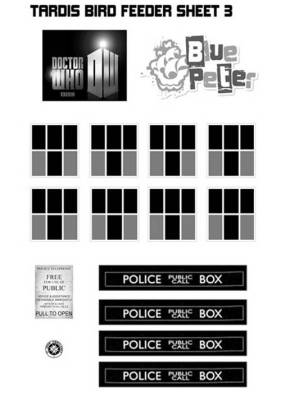
Tardis Bird Feeder

Says Community Garden Director, Marlene Wurfel, “Within an hour of hanging this in our blue spruce, a blue nuthatch arrived to hover around it in wonderment. Yes, we named him The Doctor.”
To make a Tardis birdfeeder watch this tutorial.
And print these templates (click on them for resized versions):


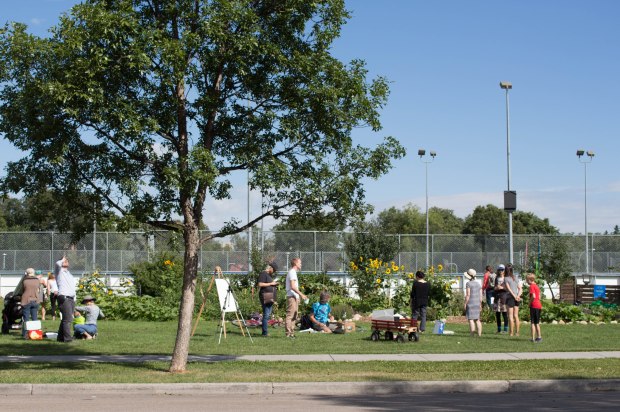
Work Bee #2 this Saturday at 10:00AM. Planting time!
For those of you who are not long-weekending out of town, get out there and get some seeds in the ground!
Much Accomplished, Much to Do
We got a lot done on Sunday. The garden is looking much cleaner. Sunflowers and potted annuals have been planted and the kid’s gardens have been kicked off by the Sprouts. There’s still plenty more planting and cleaning up to do, though, so get your gear on!
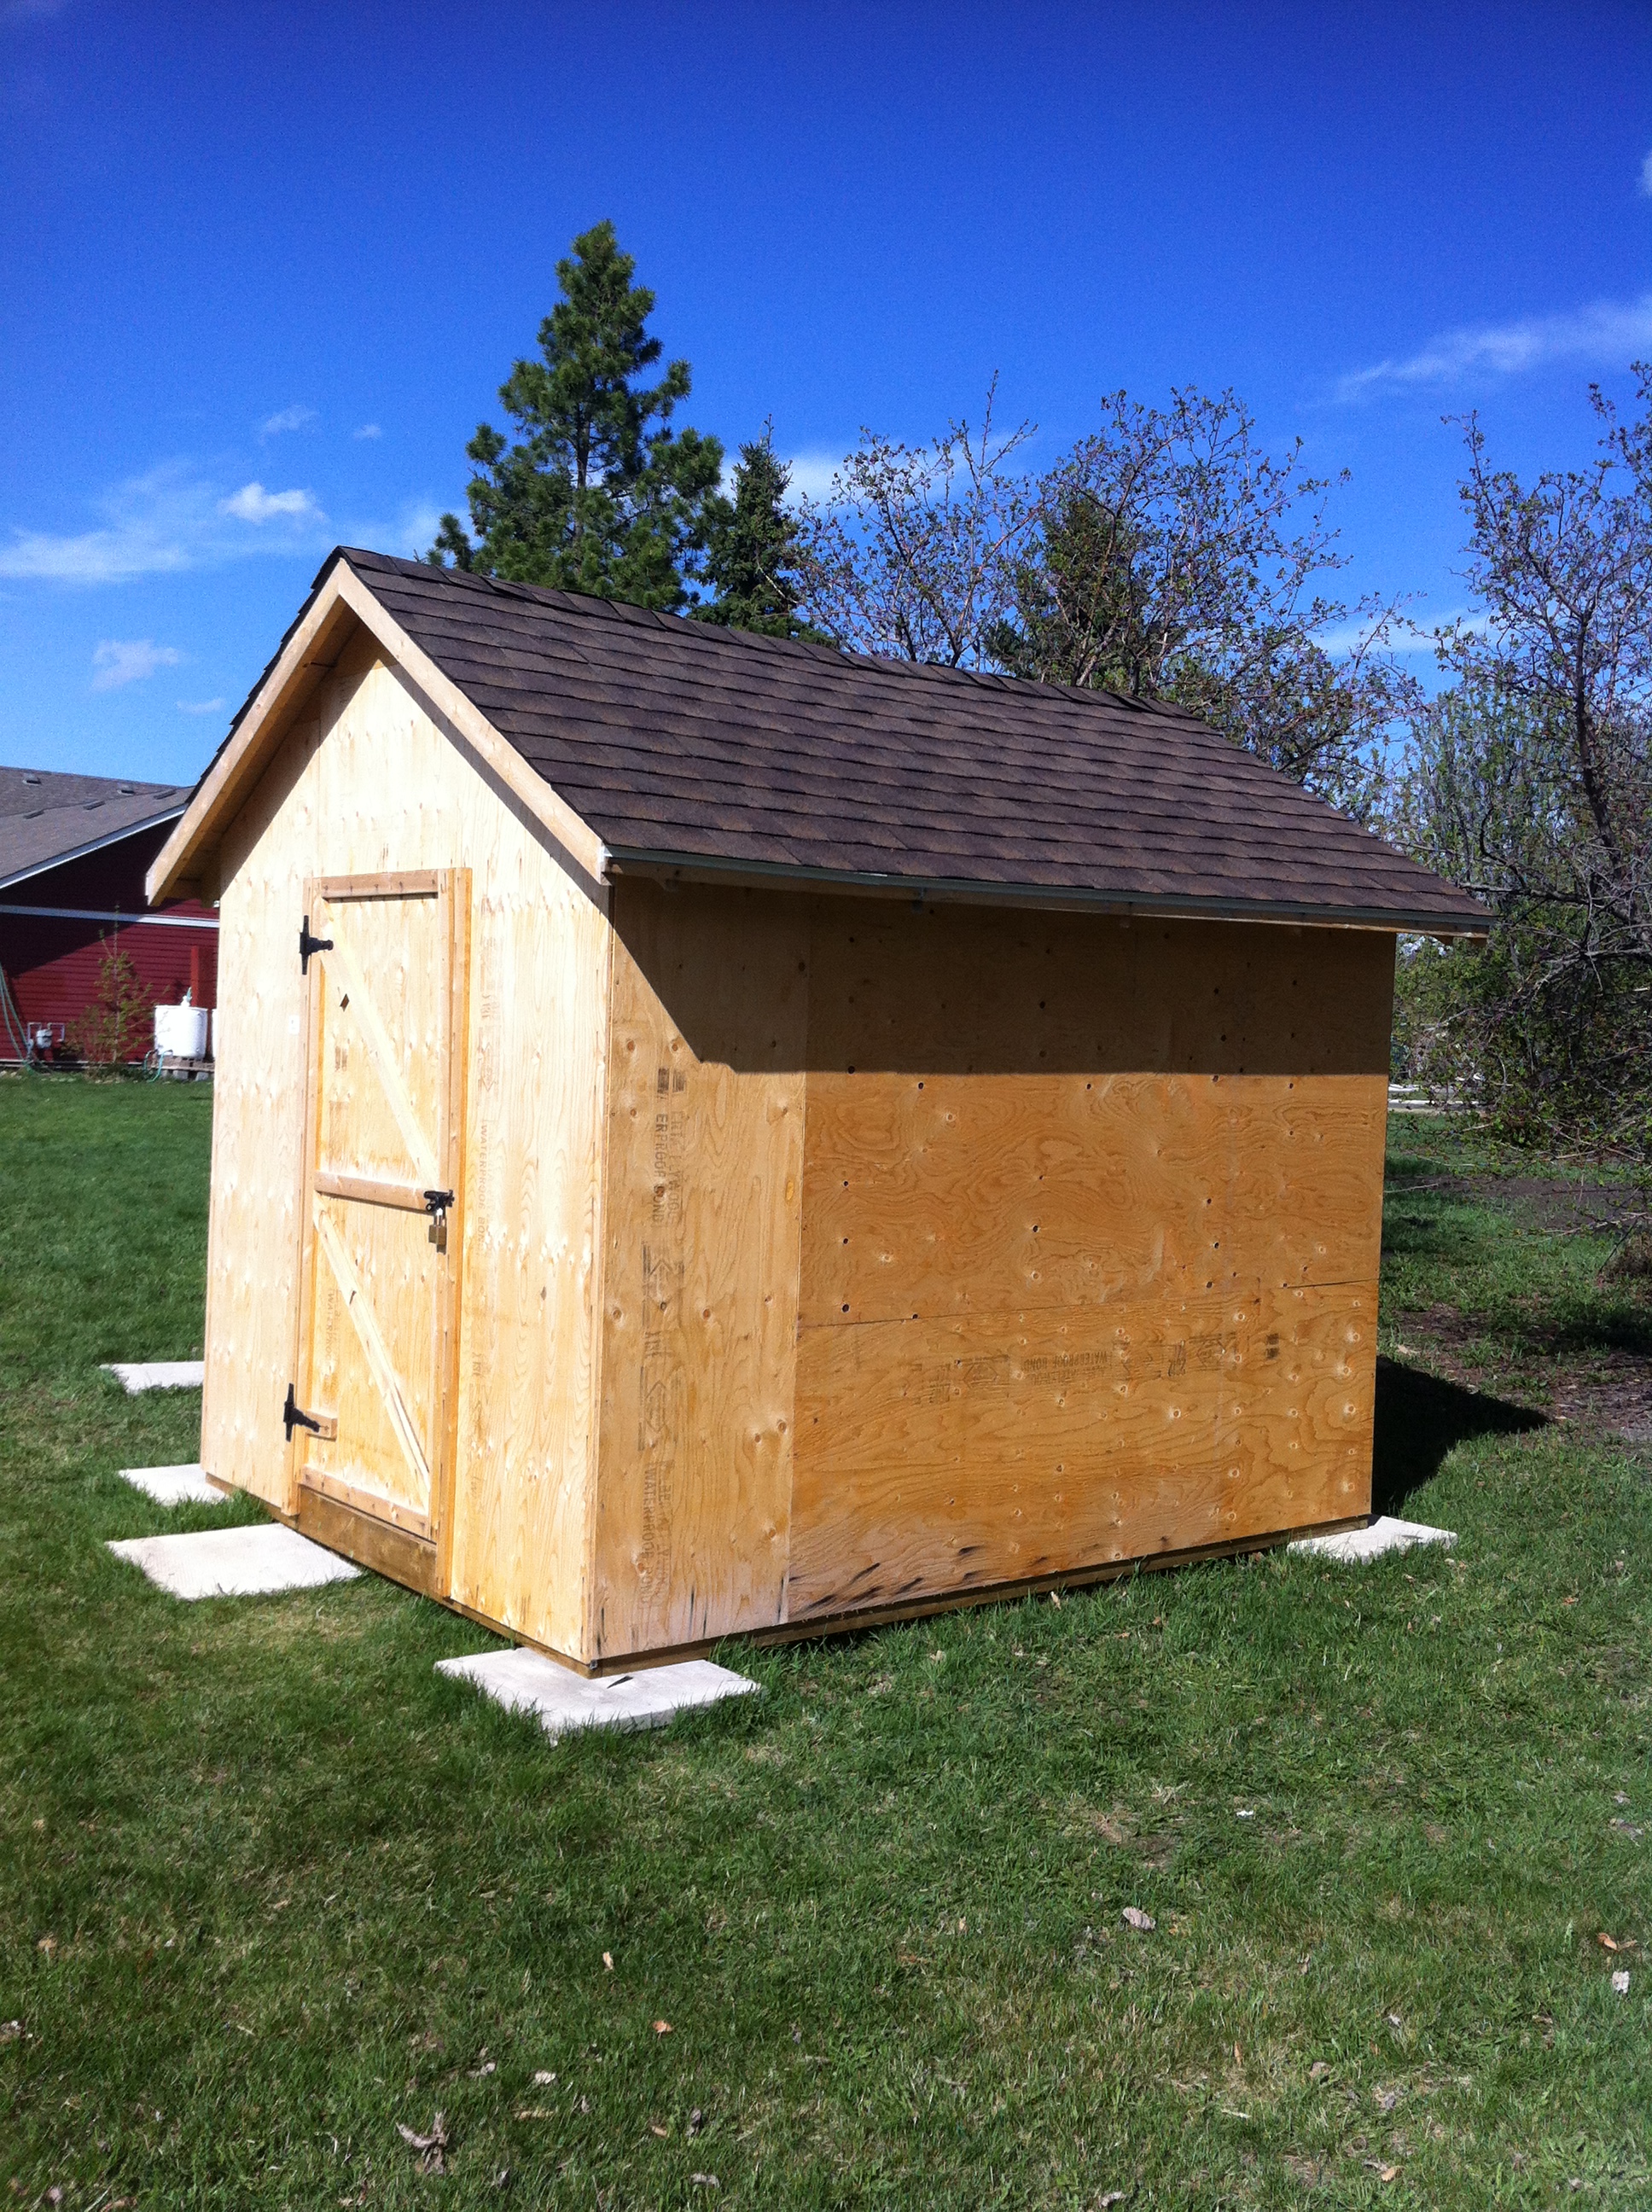
Also, I shingled our shed. Doesn’t our shed look a lot better with singles? And what could Mother want on Mother’s Day that’s better than a shingled shed??
OK, so next time we’ll choose a better day.
Anyway, we still need to paint and move it, though, so please, please, please let us know if you can help out!
First garden work bee Sunday May 12, 1:00PM
We have a lot to get done, including moving, roofing, and priming the shed, altering the composters, and getting the garden itself underway, so please come and help out. The more the better!
2013 Gardening Season Begins
At last! Who’s ready to get started?
Of course, some of you have already been preparing with the seedlings. And did you know there are lots of things that you can plant outdoors in Edmonton in April? Some plants germinate just fine in chilly soil and can take a light frost besides: peas, lettuce, kale, spinach, radishes, and green onions, for example. In fact, most years you can plant these things in mid-April. I have managed to get full salads out of cold frames by this time in previous years, but this year the heavier than usual snow and slow thaw have made things difficult. Warmer weather plants should not go out for a month yet, until the end of May – or better, the beginning of June.
On to business!
- The shed is awesome (thanks again, everyone!) but not particularly beautiful. Over the next few weeks, we need to paint and roof it and move it back from the curb. We will plant scarlet runner beans in front of it and turn it into a wall of green. Please let us know if you can help! I can be reached through comments or at sustainability@parkallen.ca
- We are also considering taking the composters down a slat or two to give them a less intrusive profile, and hiding those behind a wall of sunflowers. Please let us know your opinion!
- Shortly afterwards, we will be holding our first work bee to clean up and plant the first greens. Details on that to come.
- Plans for this year also include building some raised planters for better access for seniors, and filling our shed with tools to make the gardening easier. We are still working on the funding – almost there!
- The WWF-sponsored Wild Wings project will be bringing habitat to the garden to encourage beneficial insects and birds to join our little ecosystem.
- And of course, there will be plenty of gardening with like-minded people throughout the neighbourhood and beyond … and perhaps a barbecue or two!
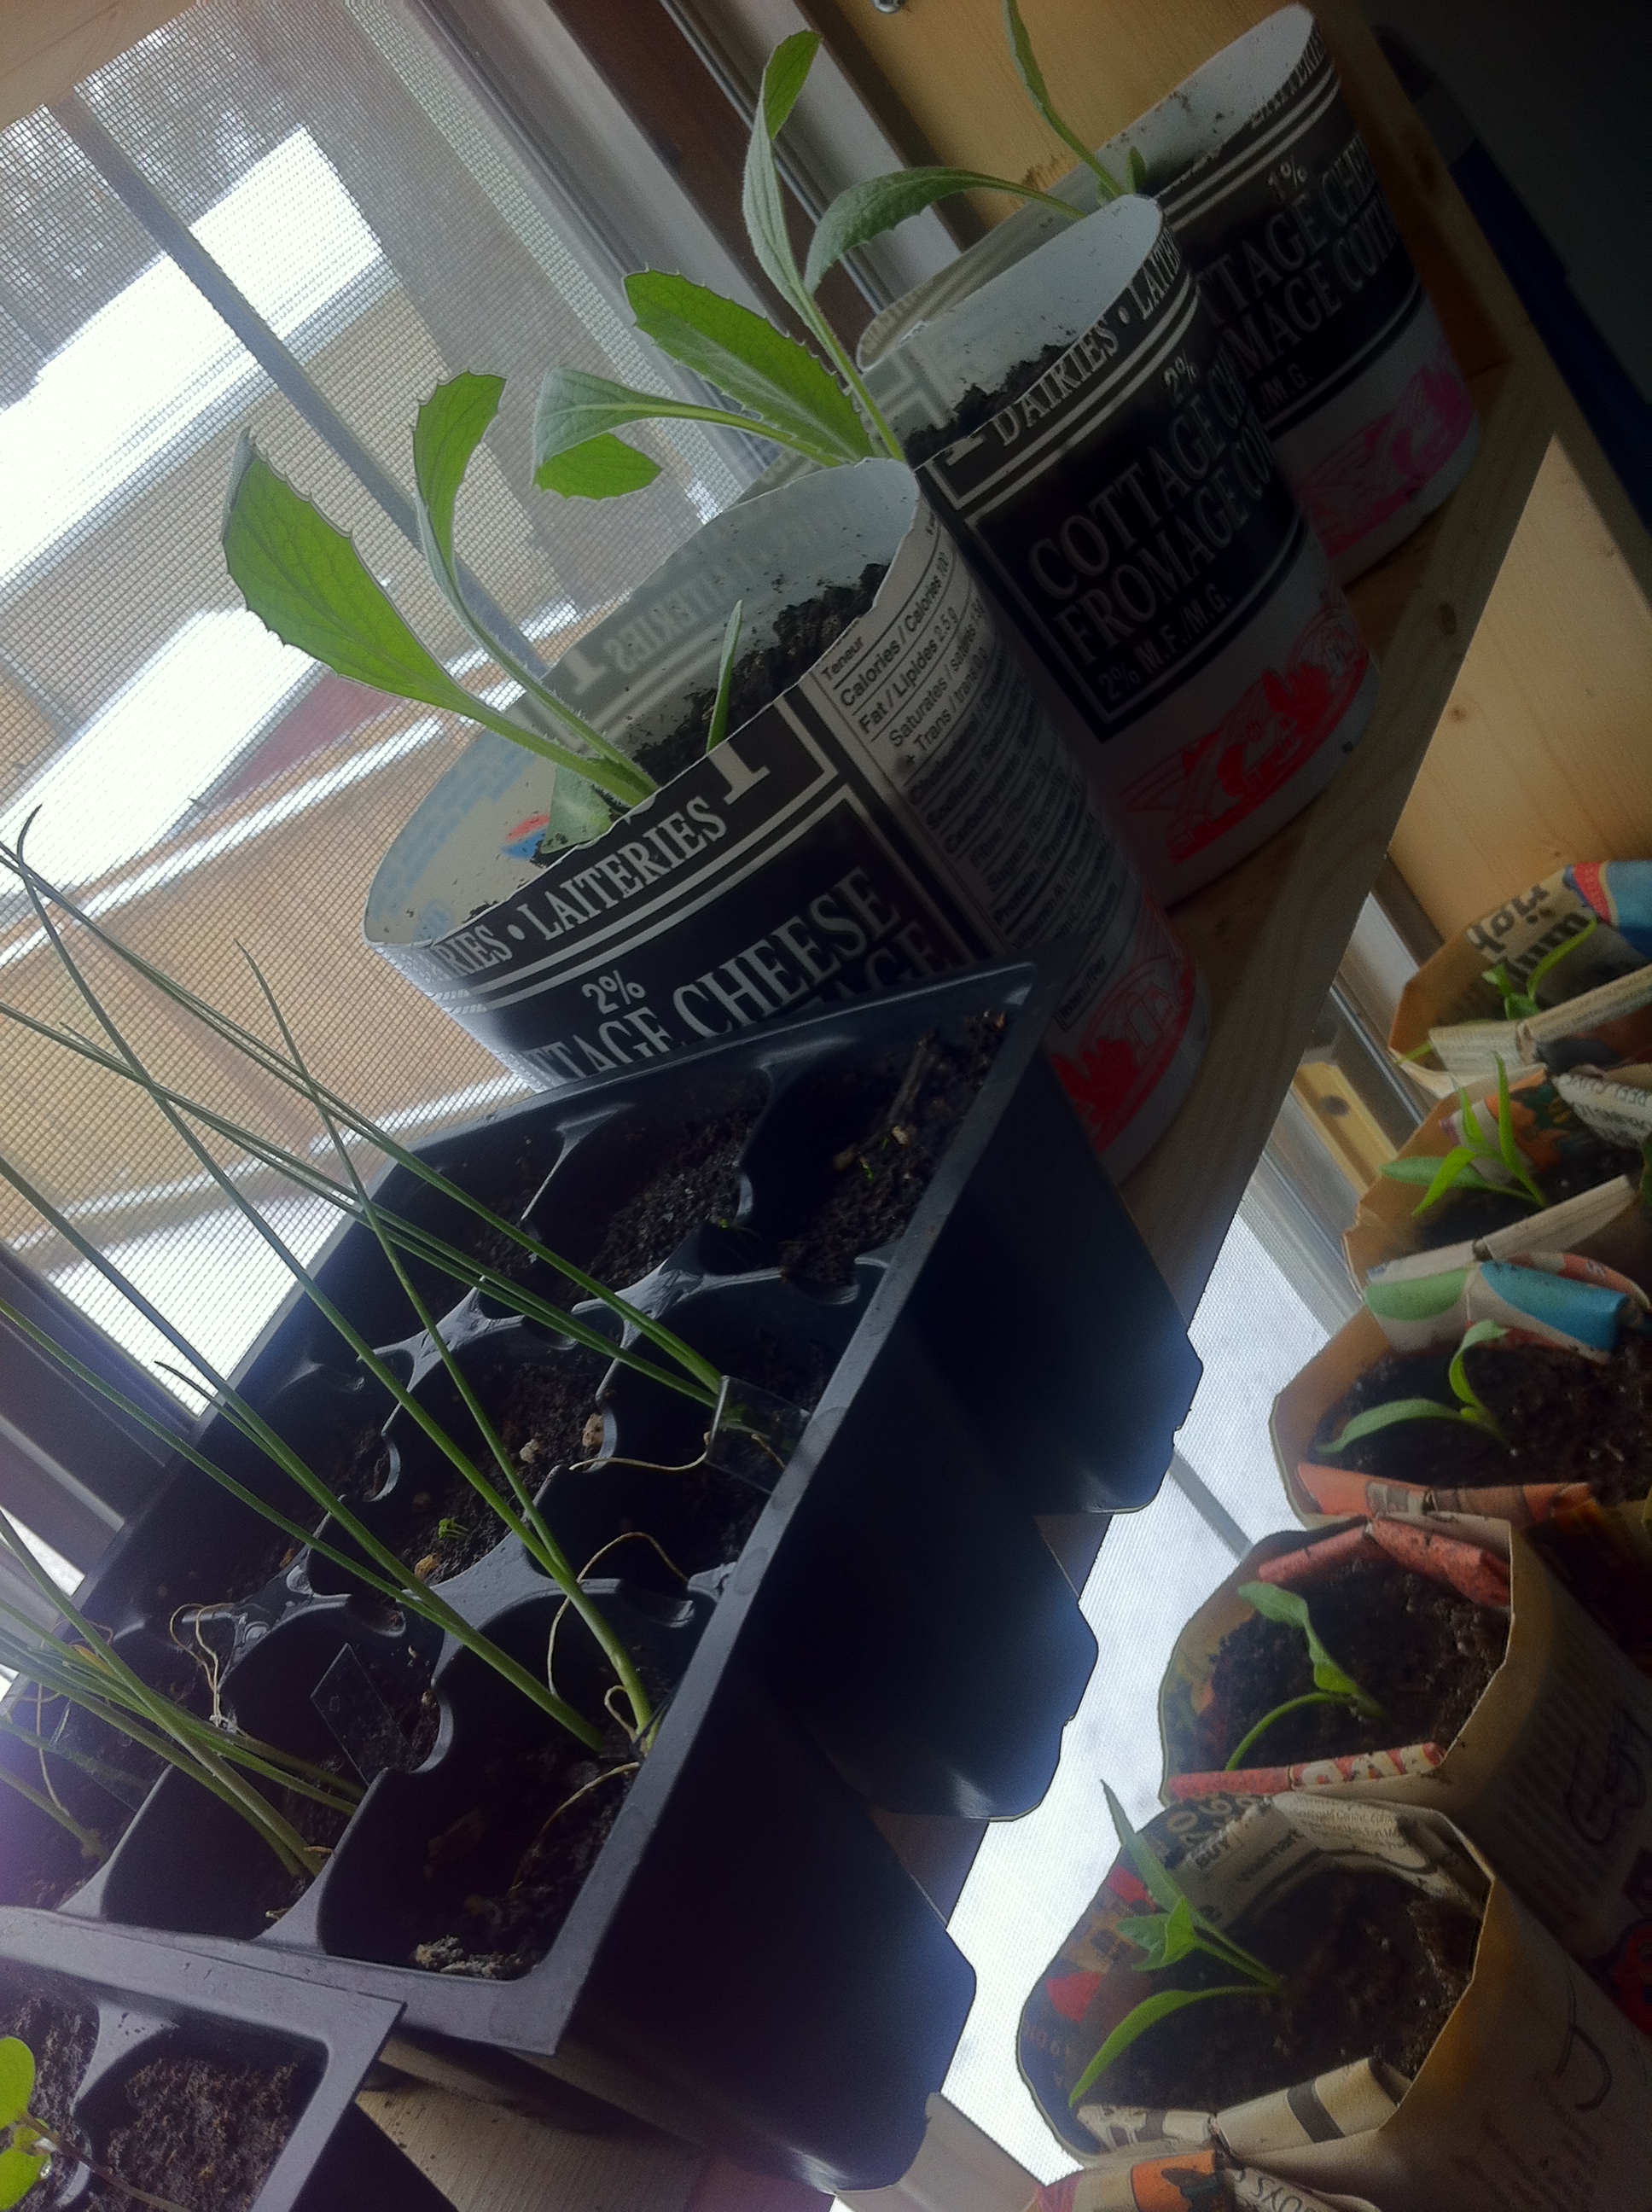
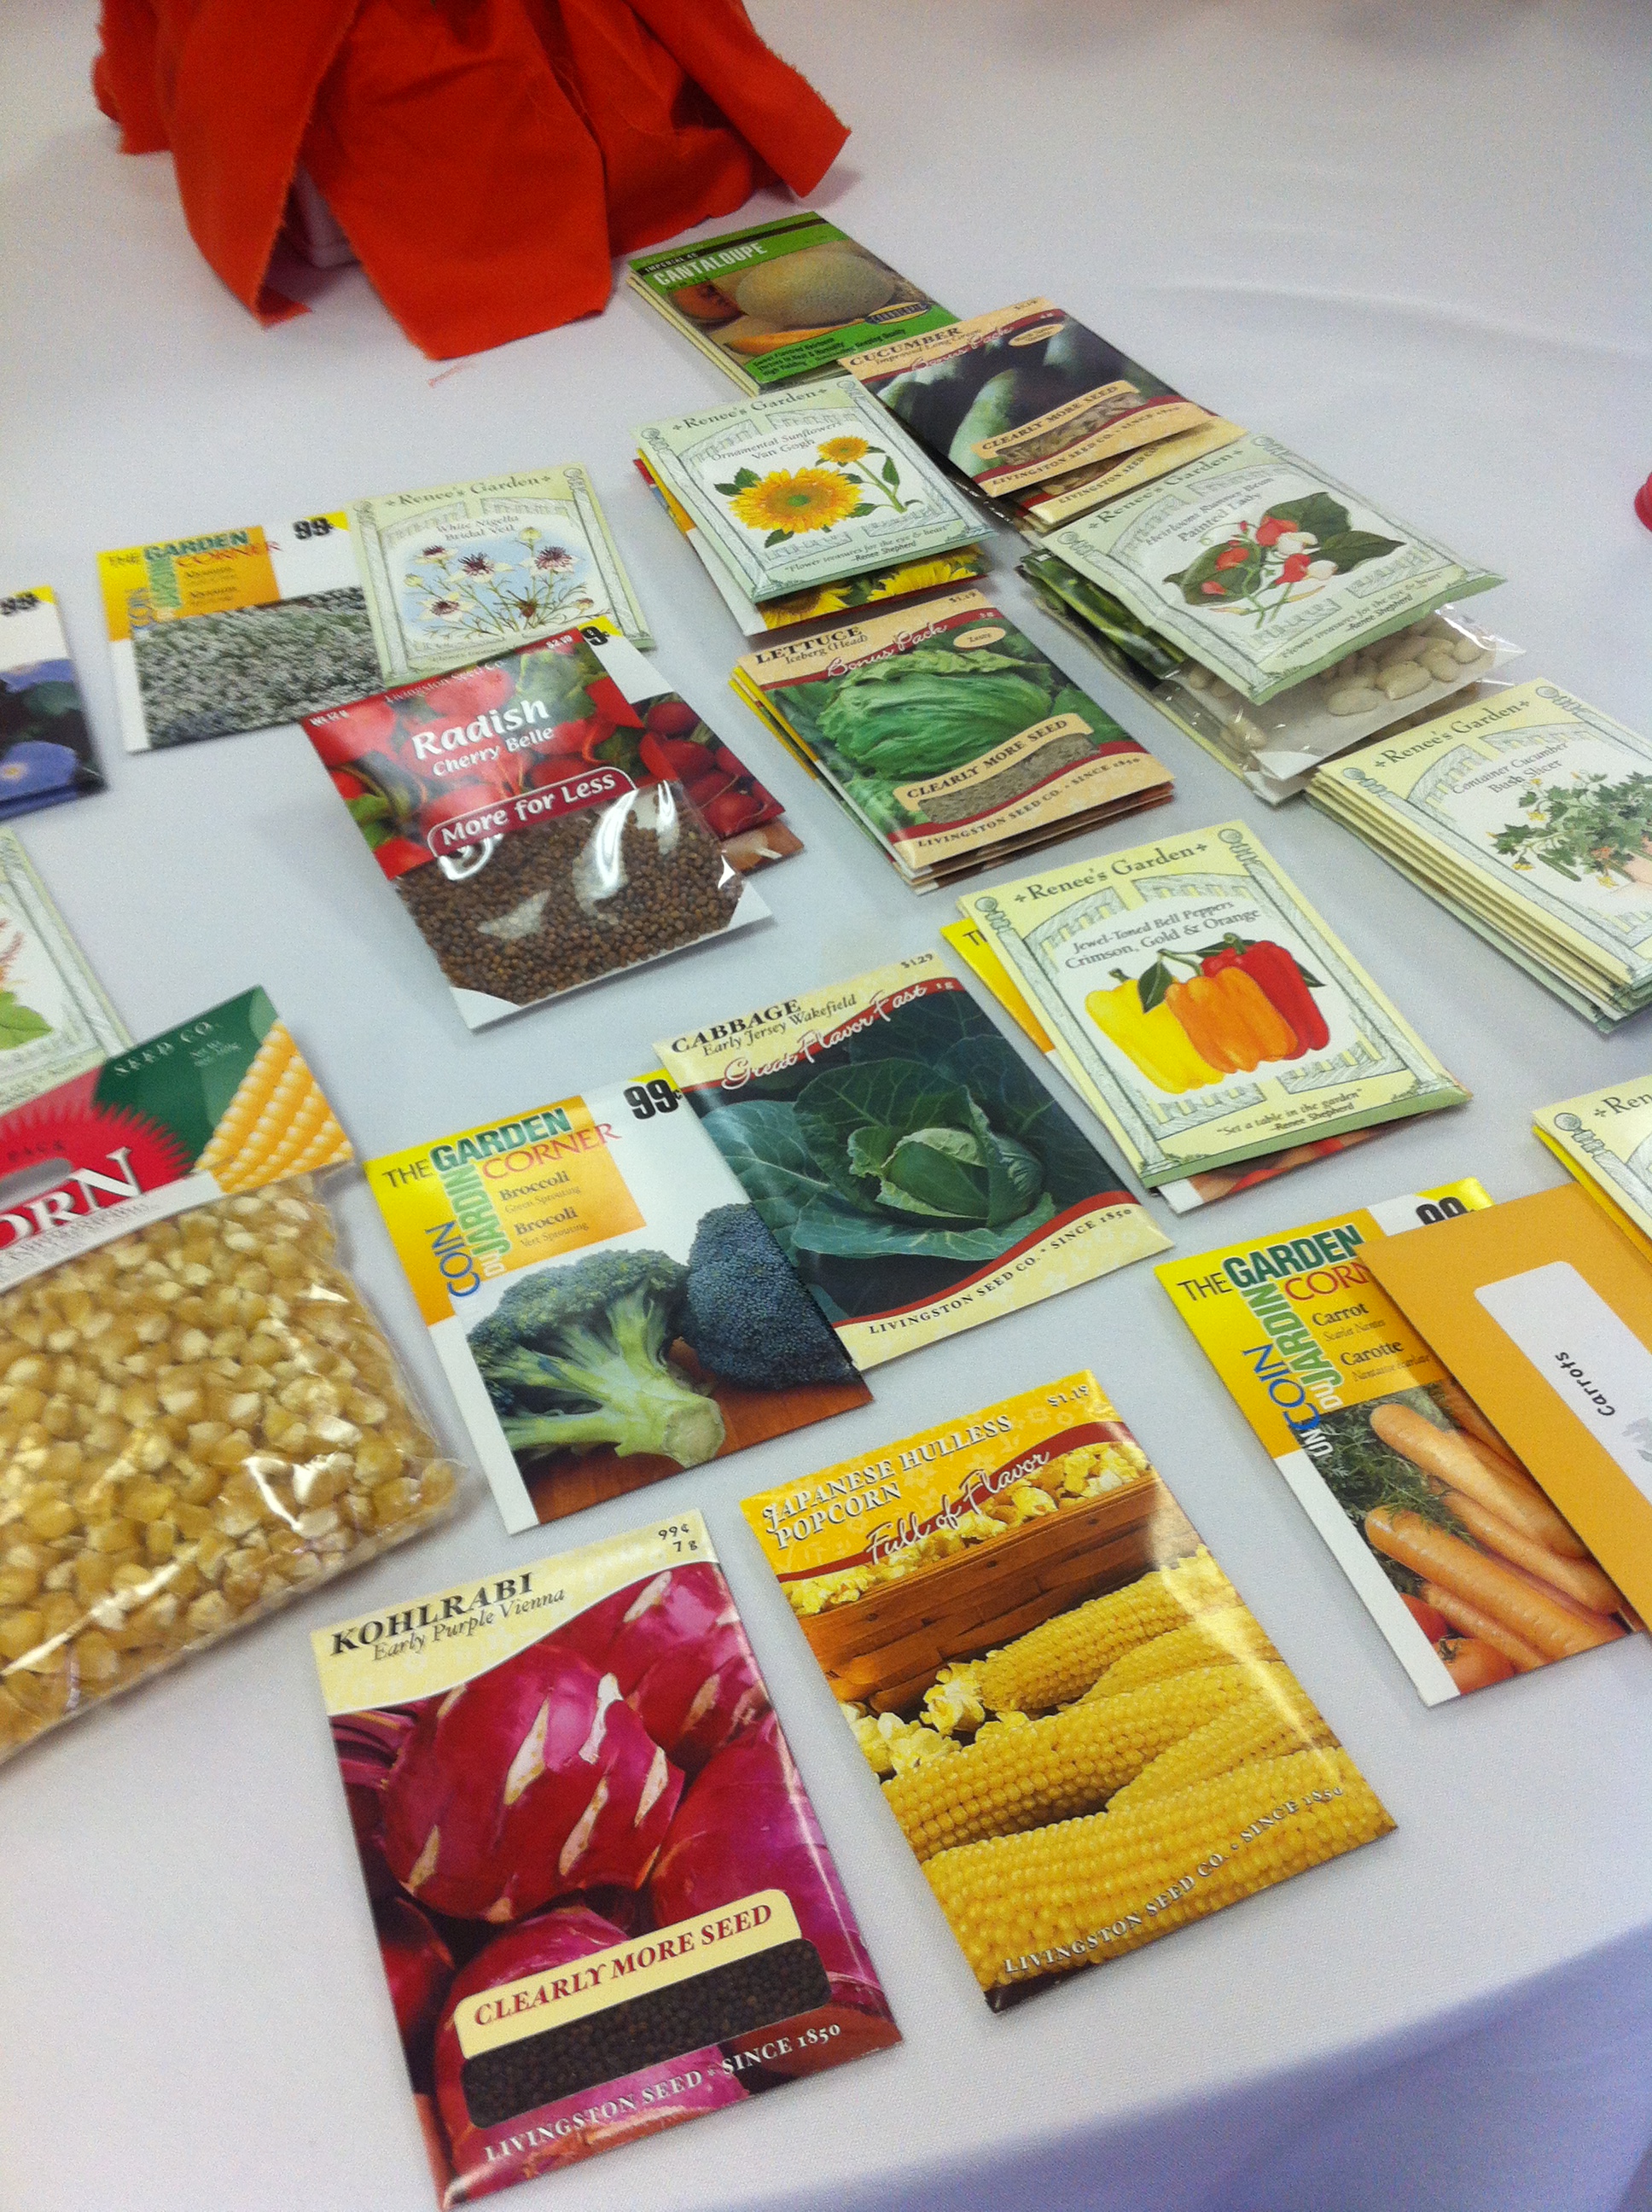
And now, a couple of pictures for fun: on the left are some of the seedlings growing on my window shelves (artichokes, peppers, leeks, lobelia). On the right, the haul of seeds we got from Sustainable Food Edmonton. It’s going to be a good year!
Raising Seedlings Part 2: Folding Paper Pots
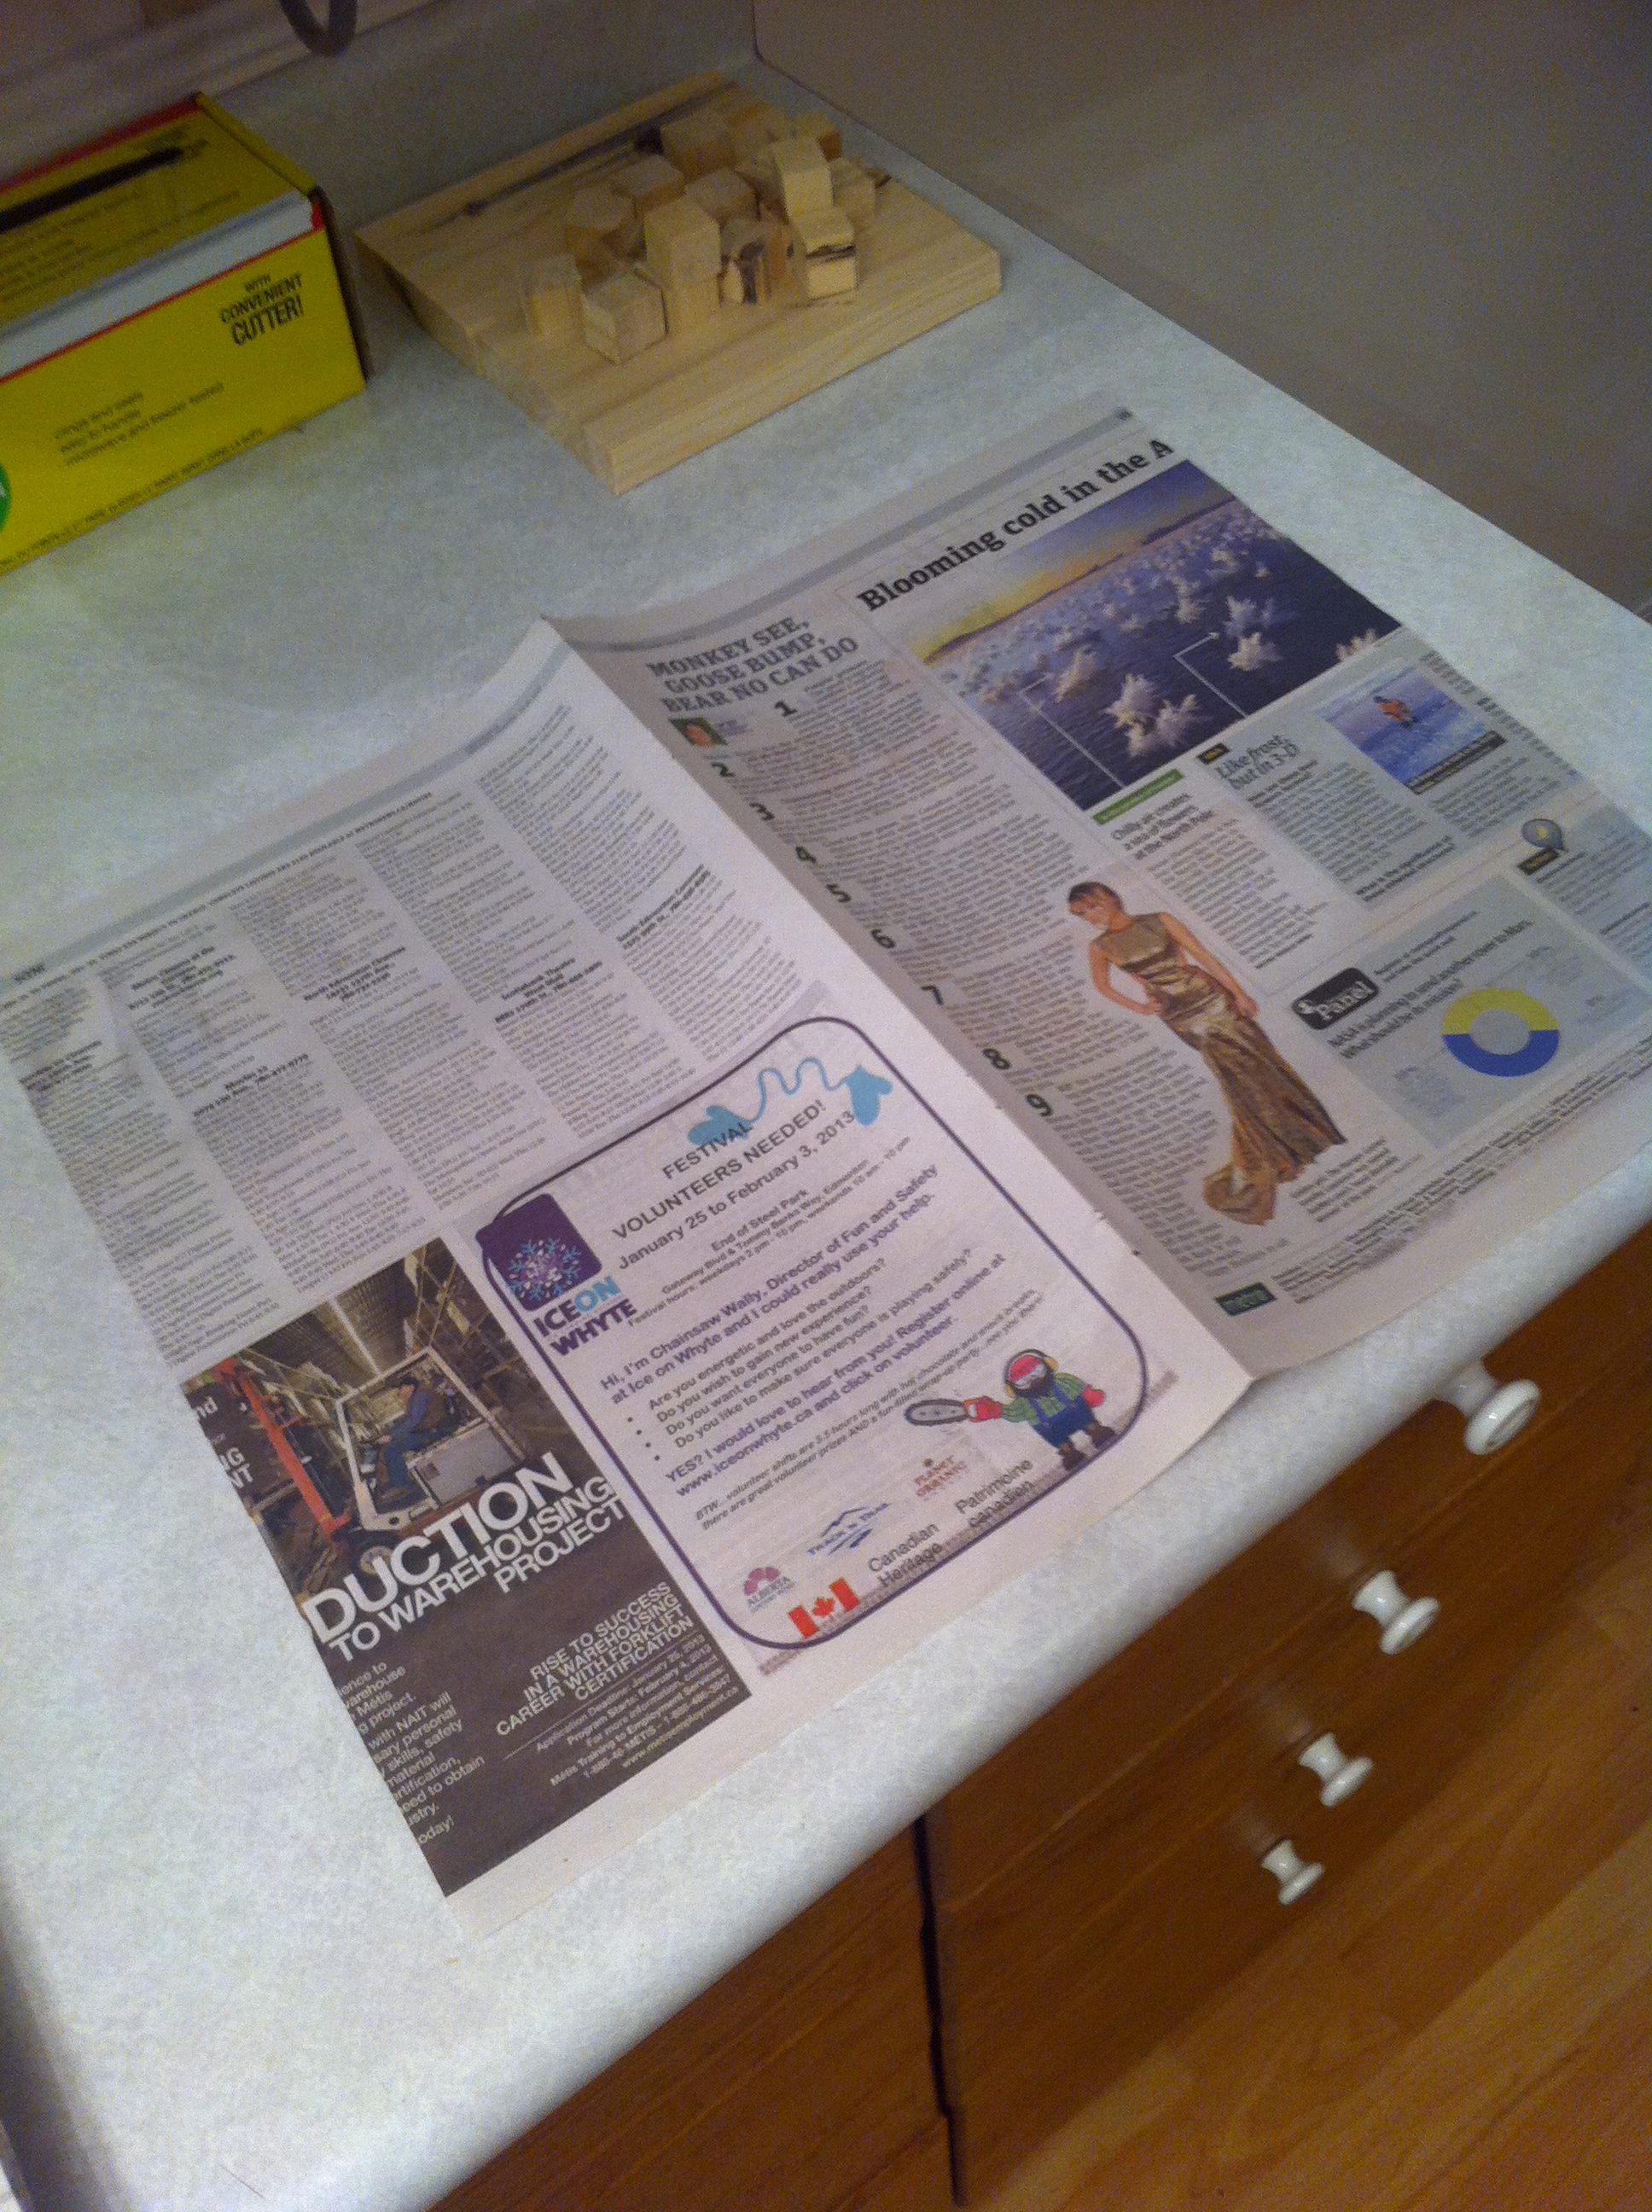
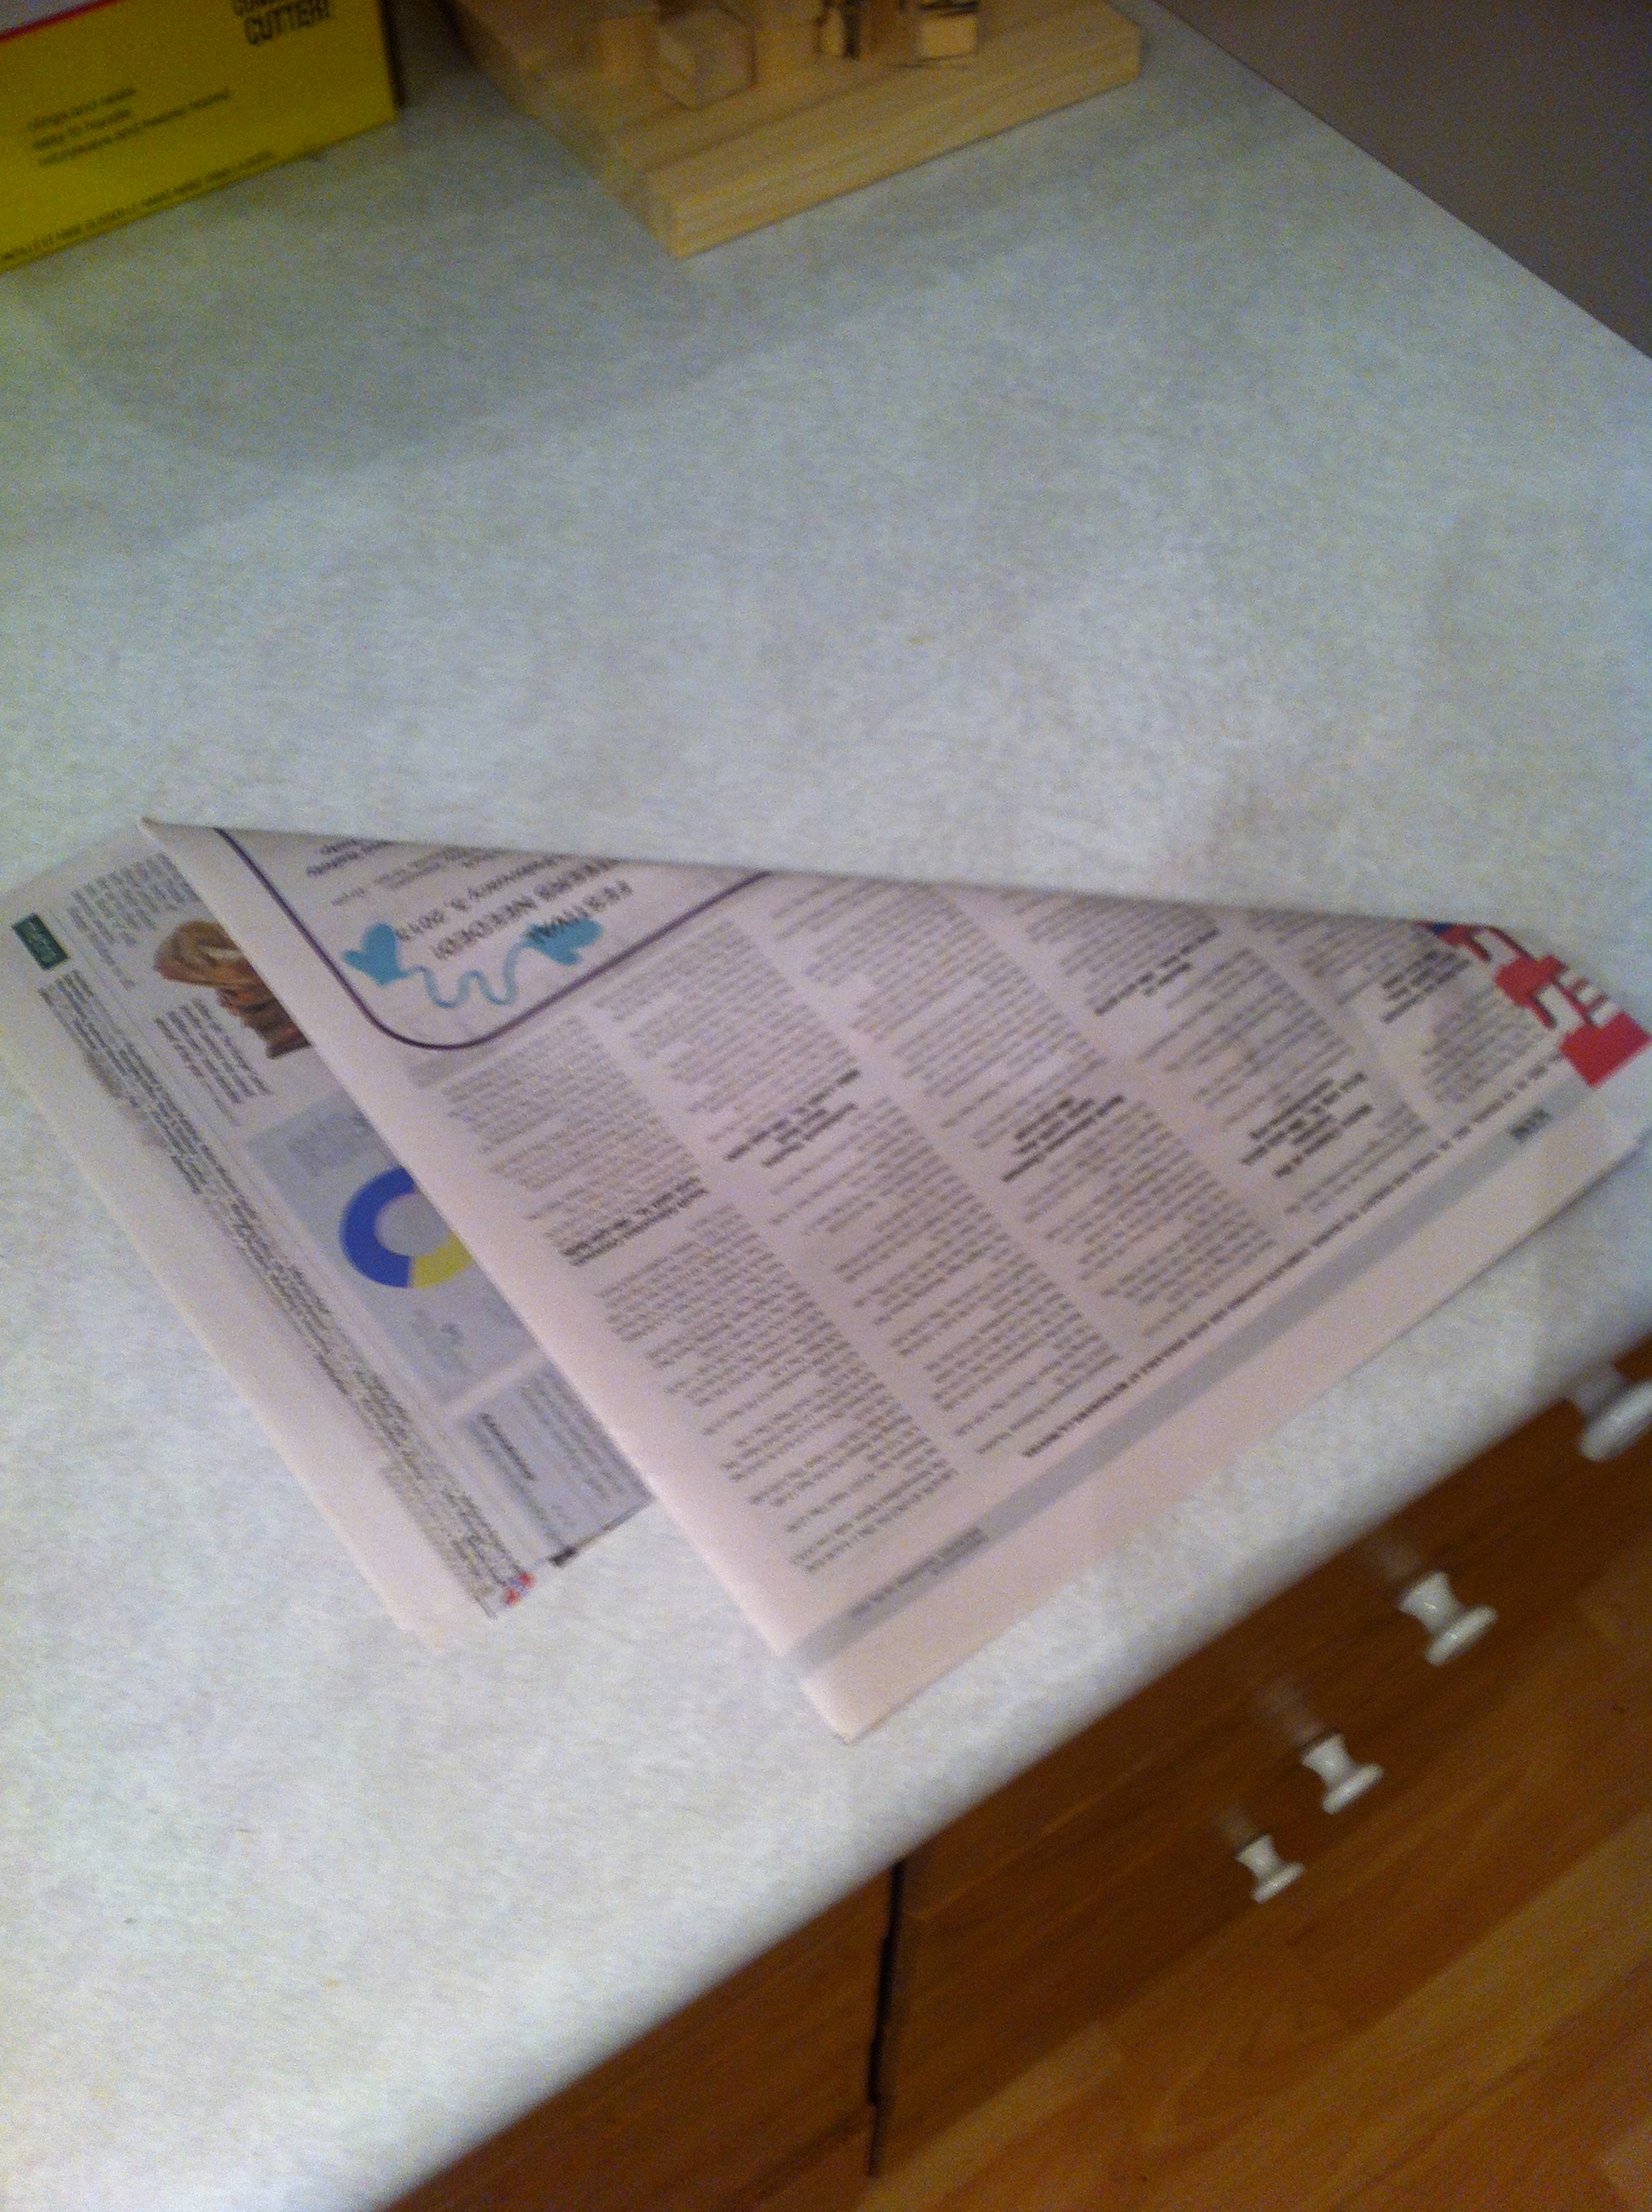
Here’s another idea that is frugal, space saving, and environmentally friendly: grow your seedlings in pots made out of folded newspaper. It’s quite simple and you get to reuse *and* recycle while producing your own local food. What could be better than that?
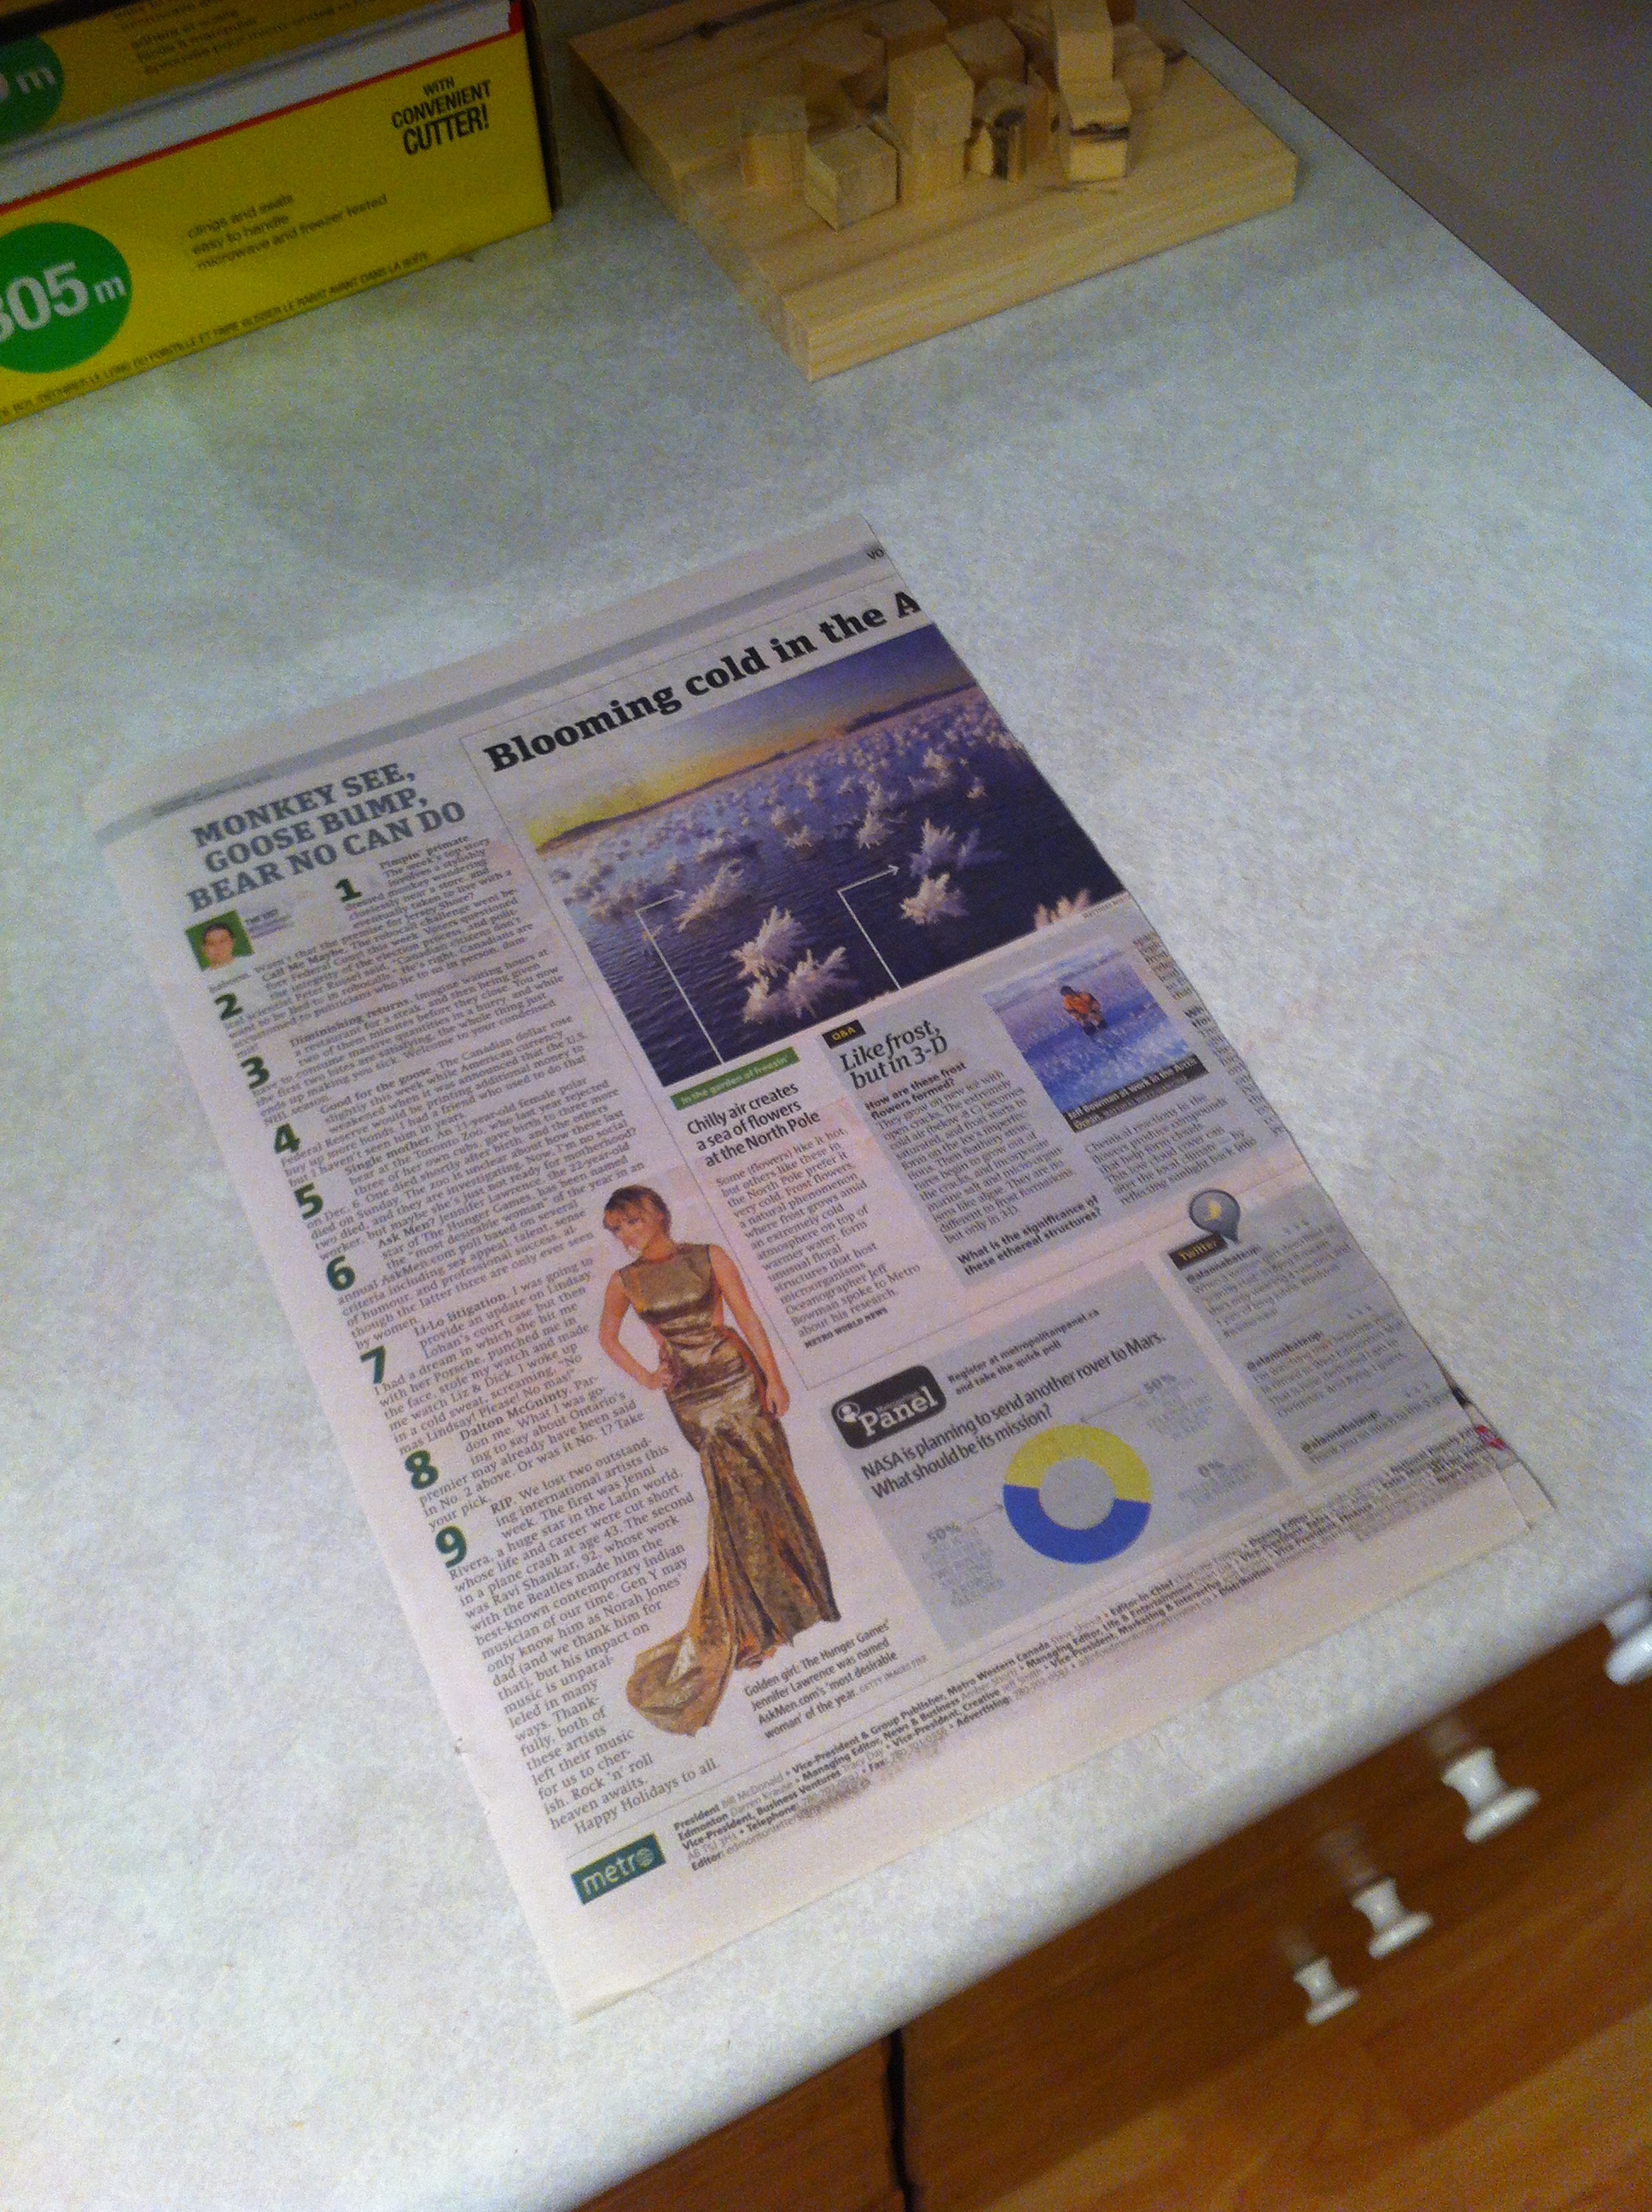
In the past, I have used old seed catalogues and flyers for this. This year, I grabbed a bunch of copies of the Metro out of the recycle bin at my kids’ school. I also cut strips off the edges of the page so that the final product would have nice flaps, but that’s not strictly necessary. You’ll have to experiment.
You want to start with a rectangle, not a square, so that you will have flaps to hold the pot open when you fill it with soil. I also like to double the paper over to make it stronger, since a few weeks of wet soil will make the newsprint quite weak.
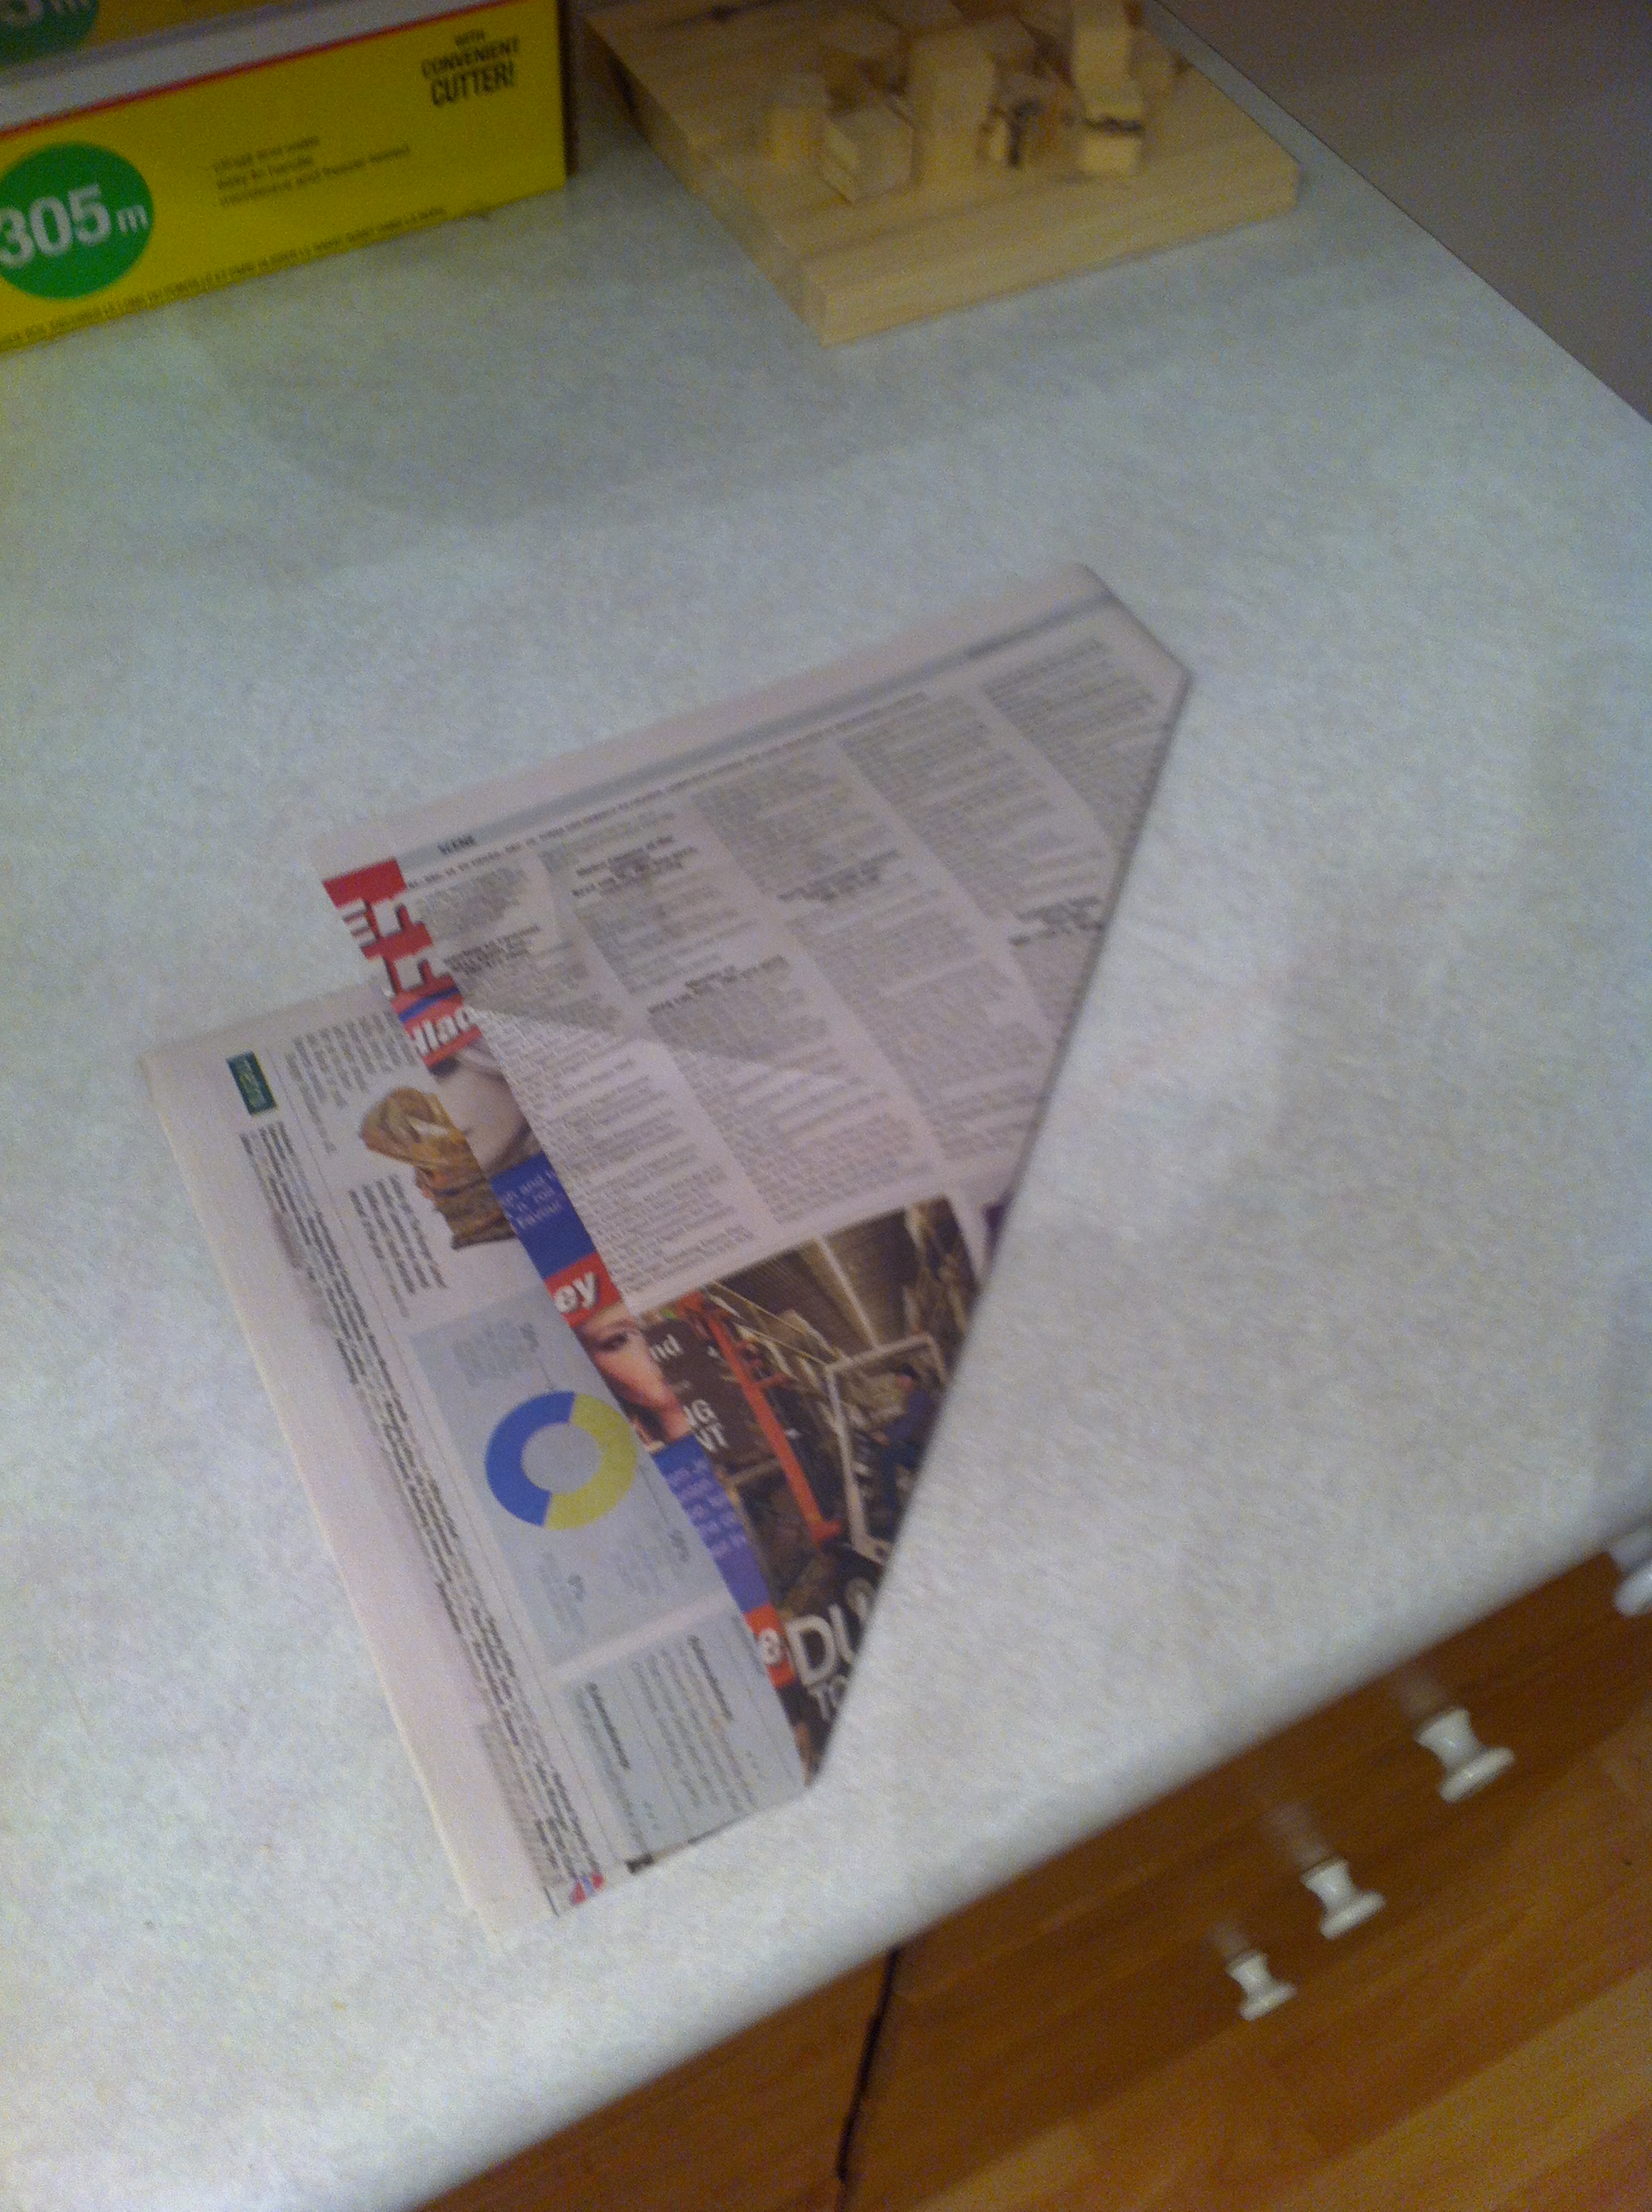
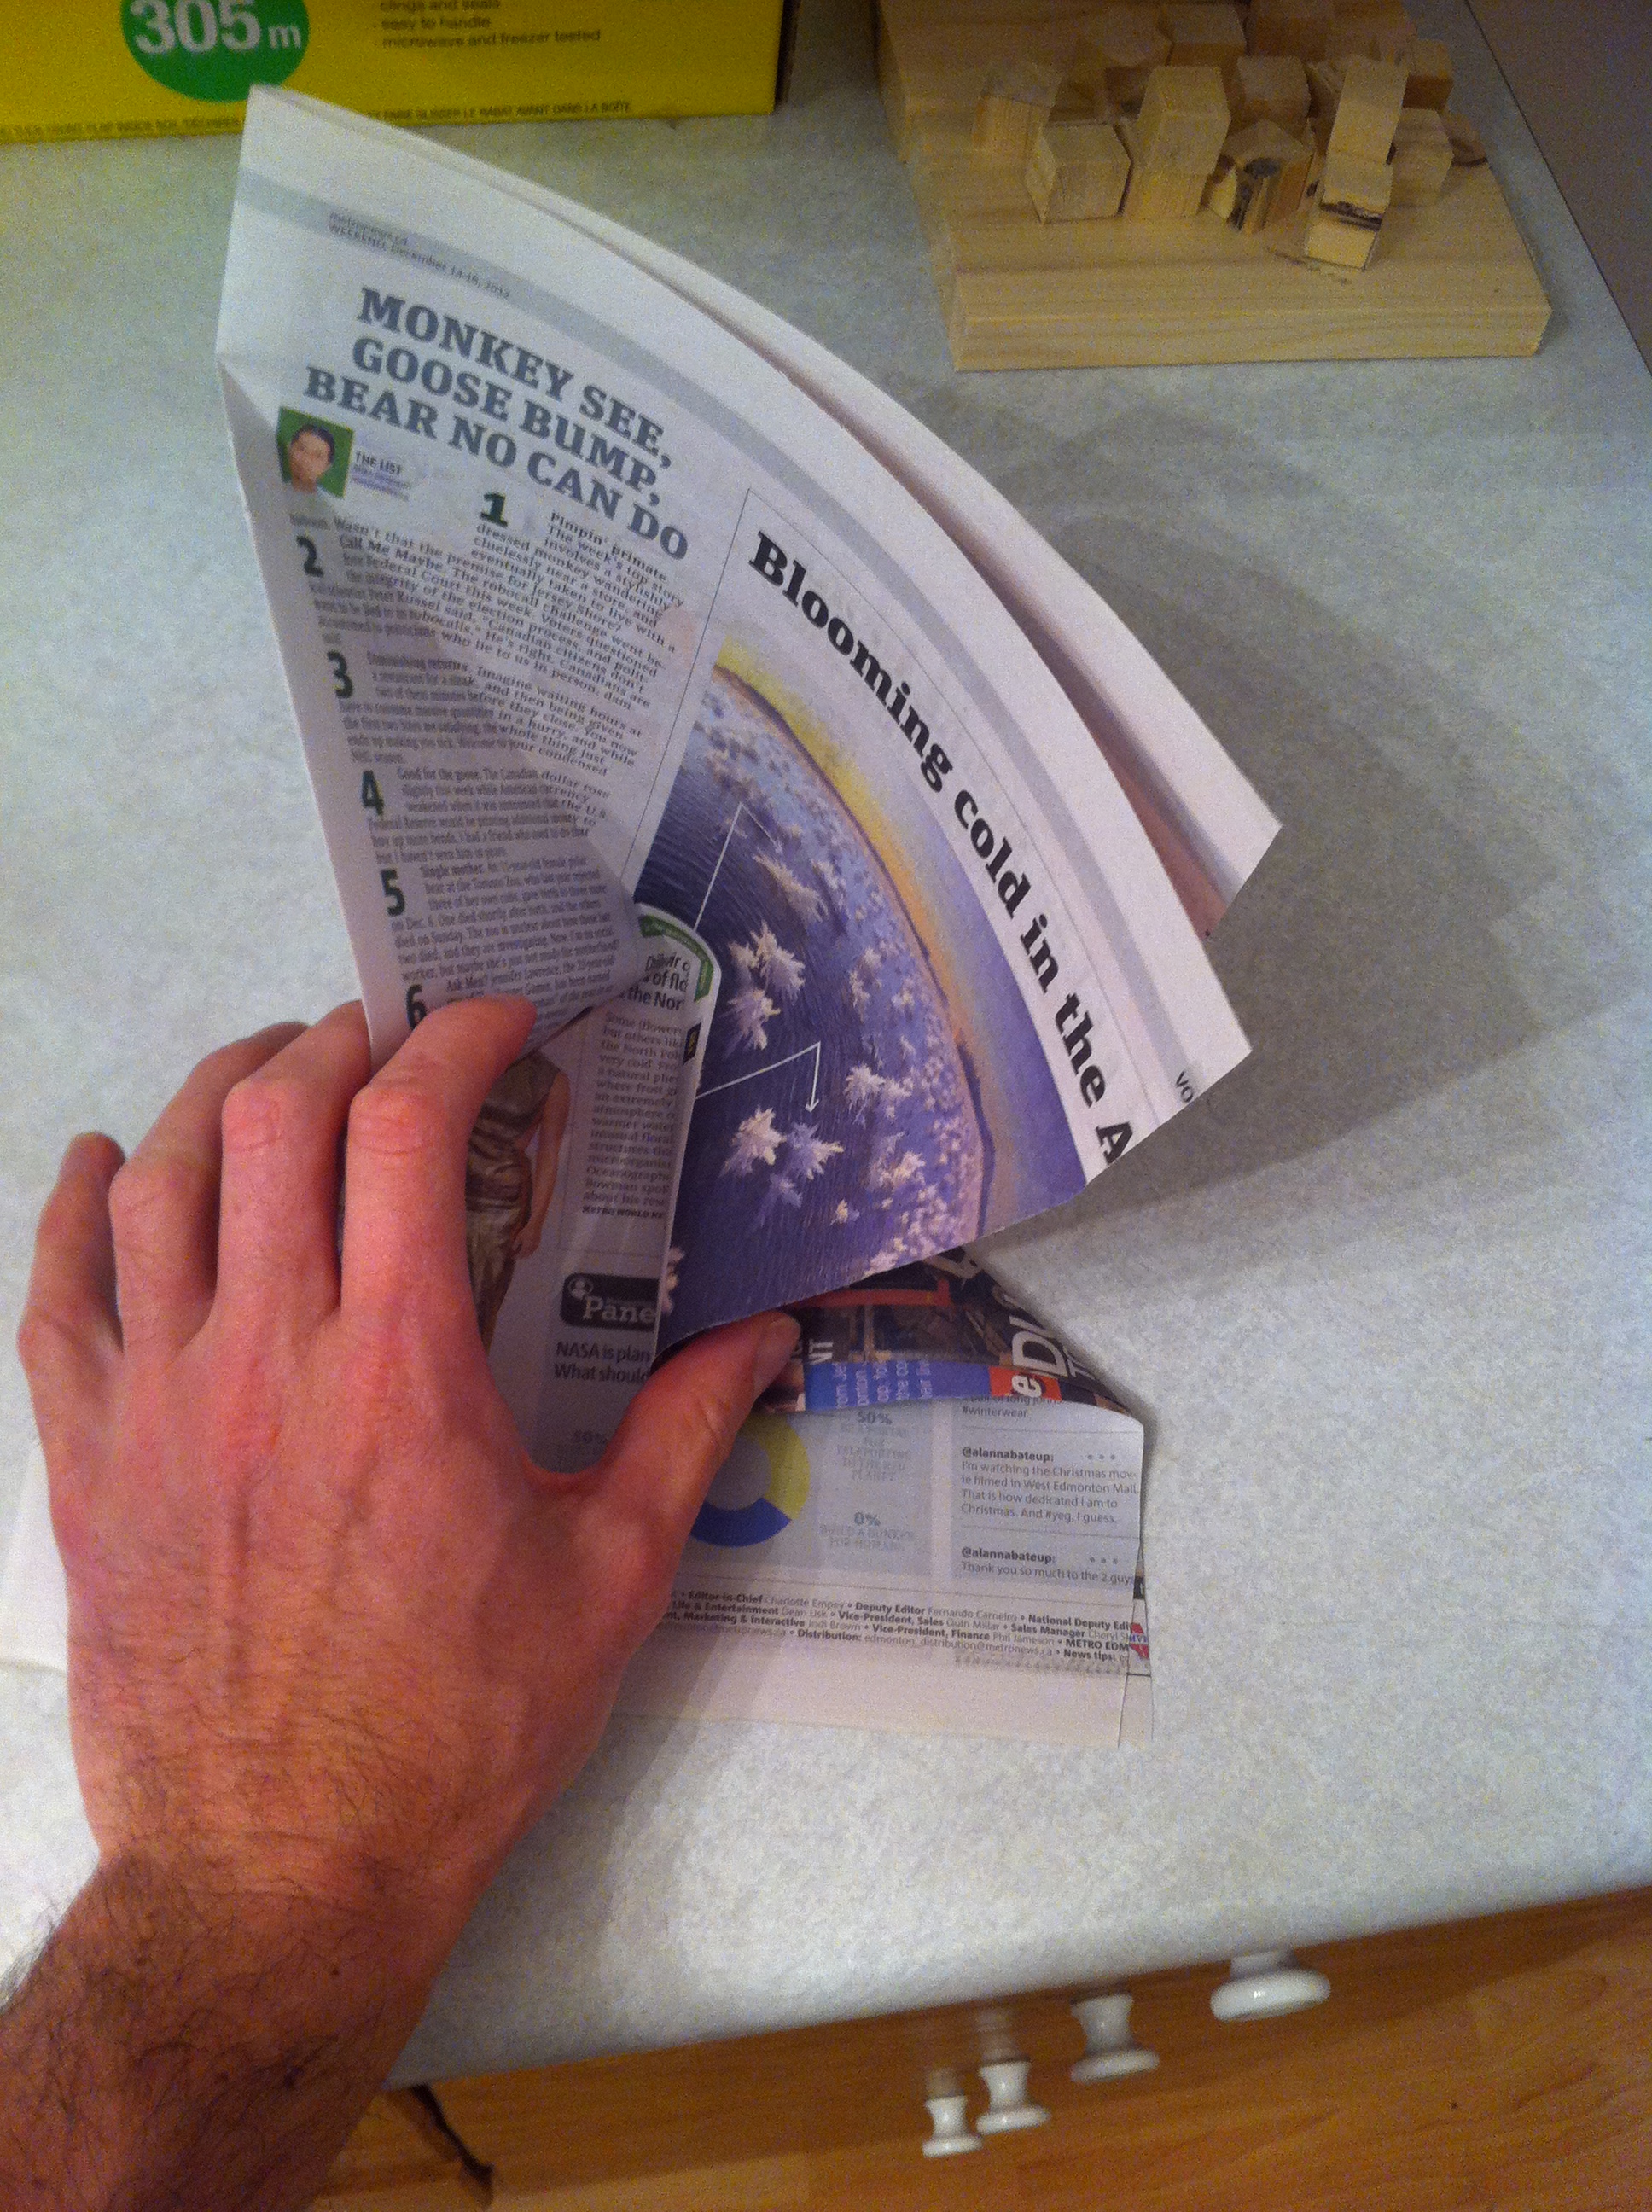
Crease an X through the middle of the paper by folding it first one way and then the other:
Now collapse it in on itself, like this:
Now fold in the flaps on both sides in two stages:
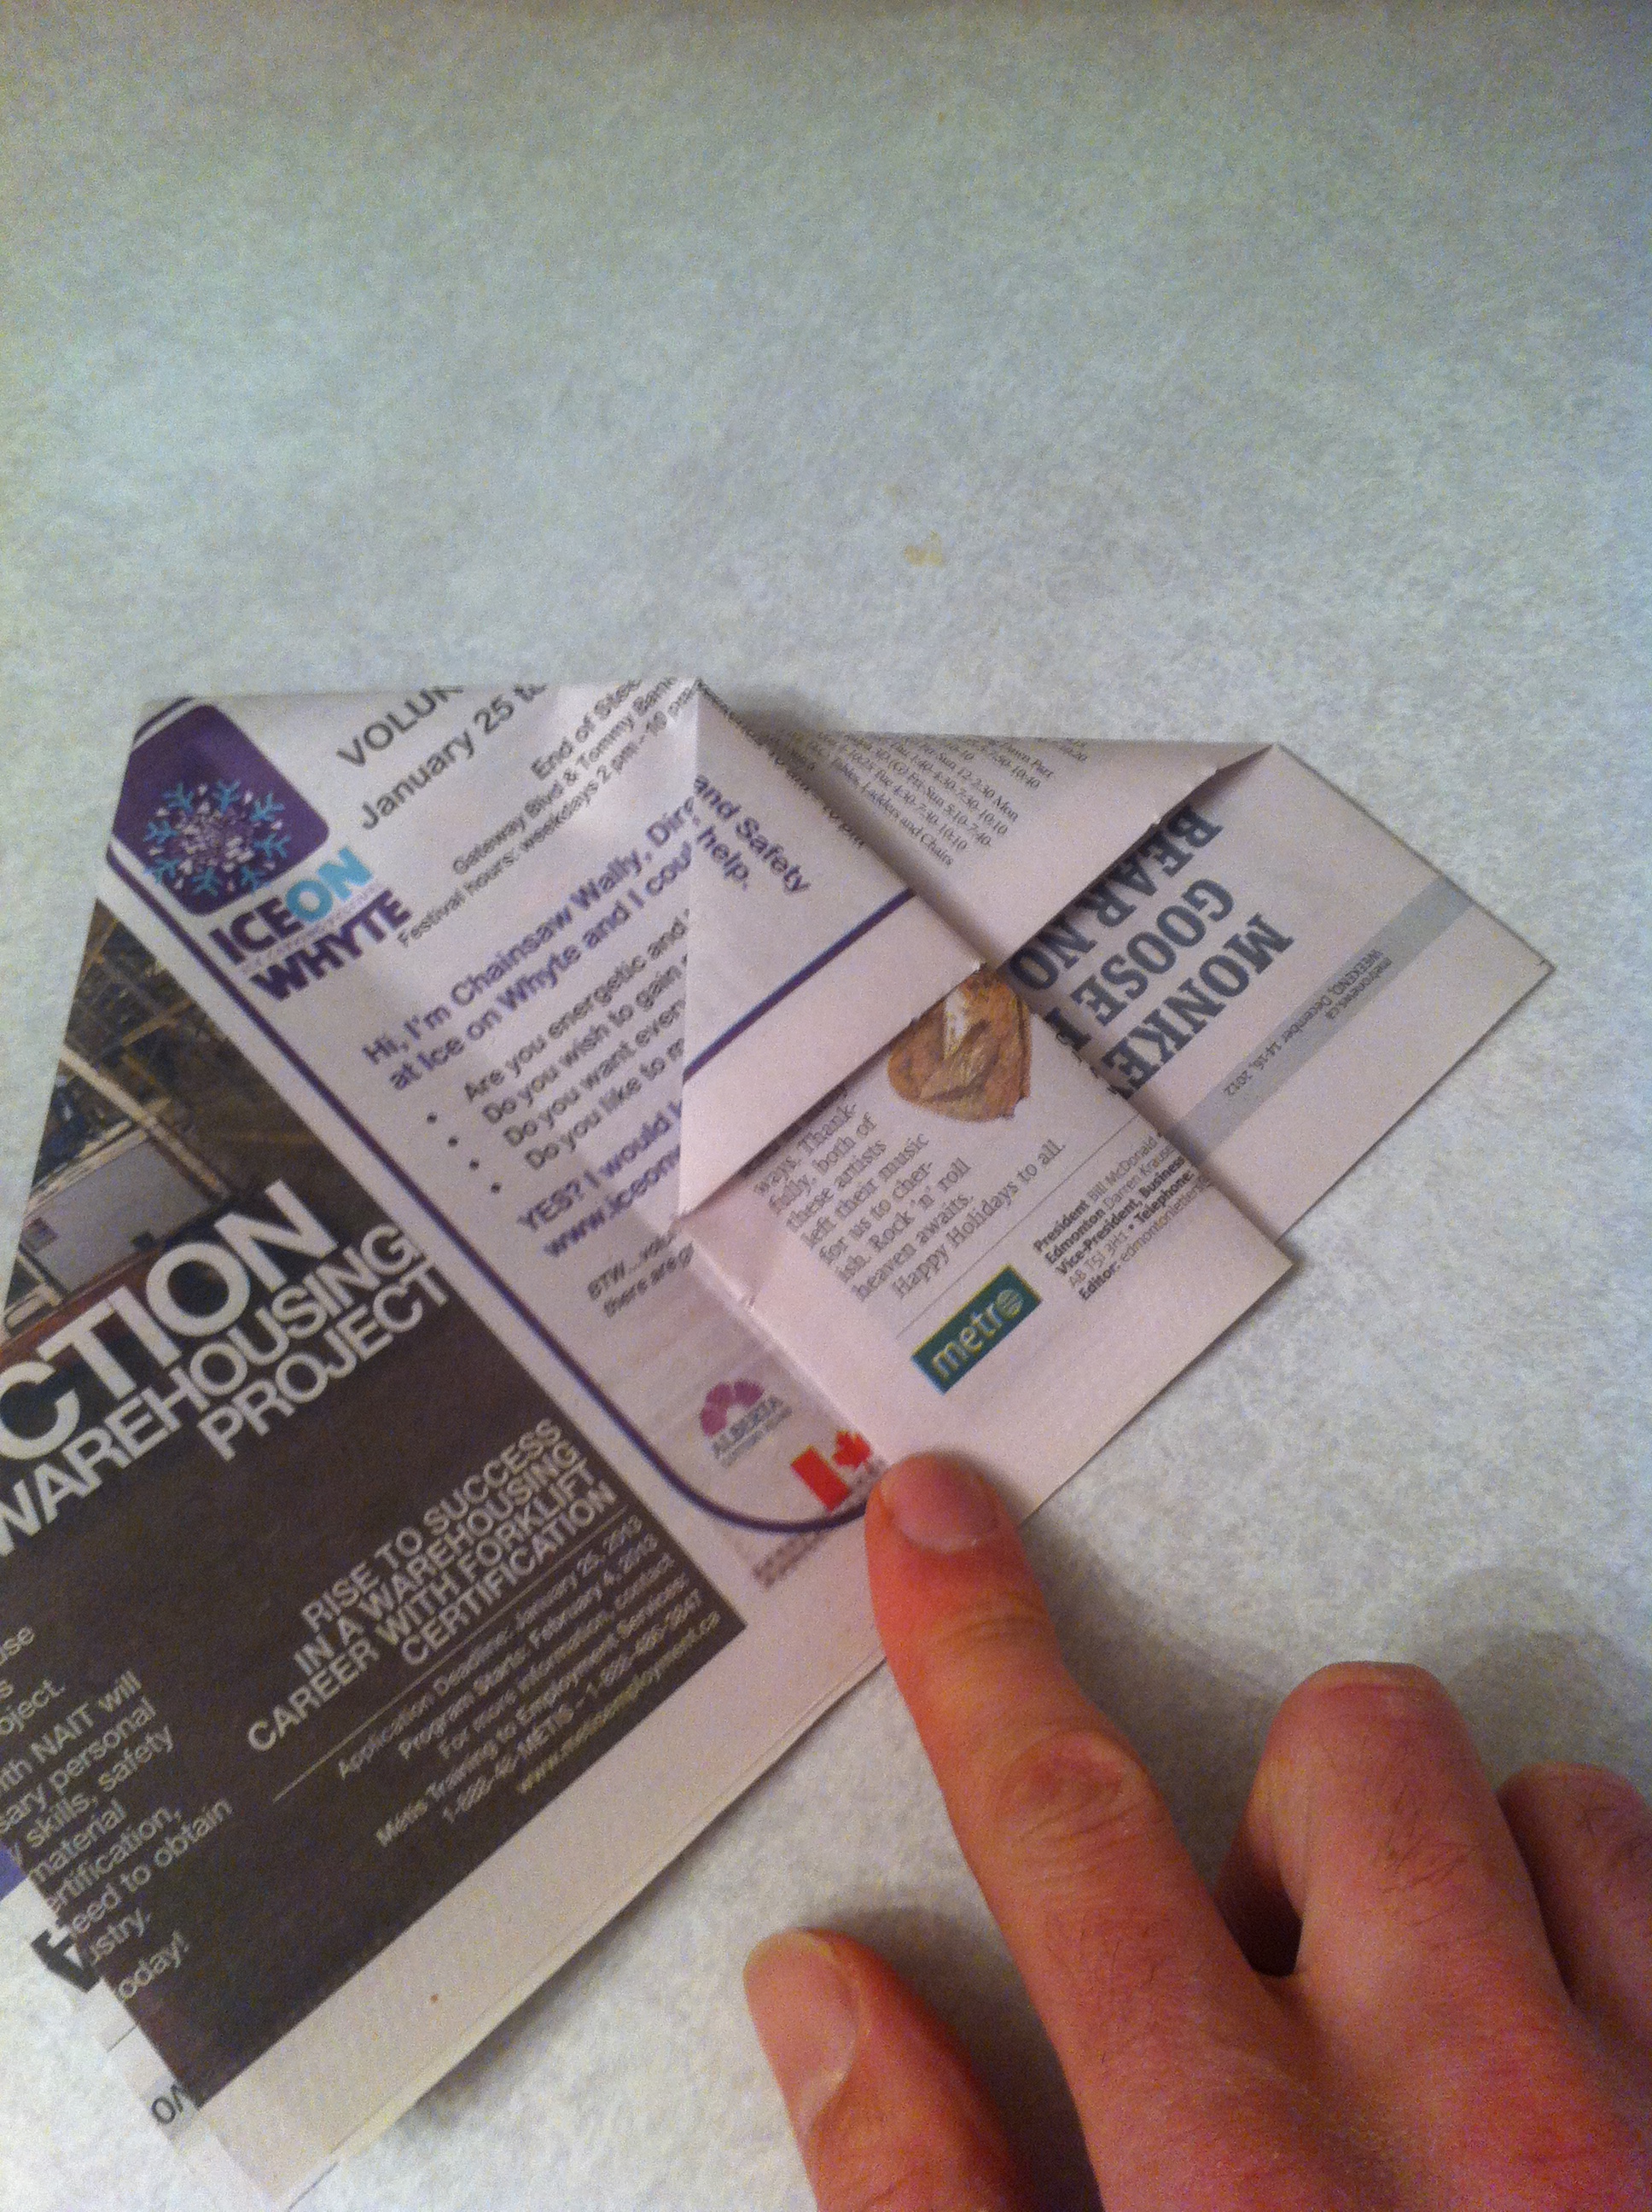
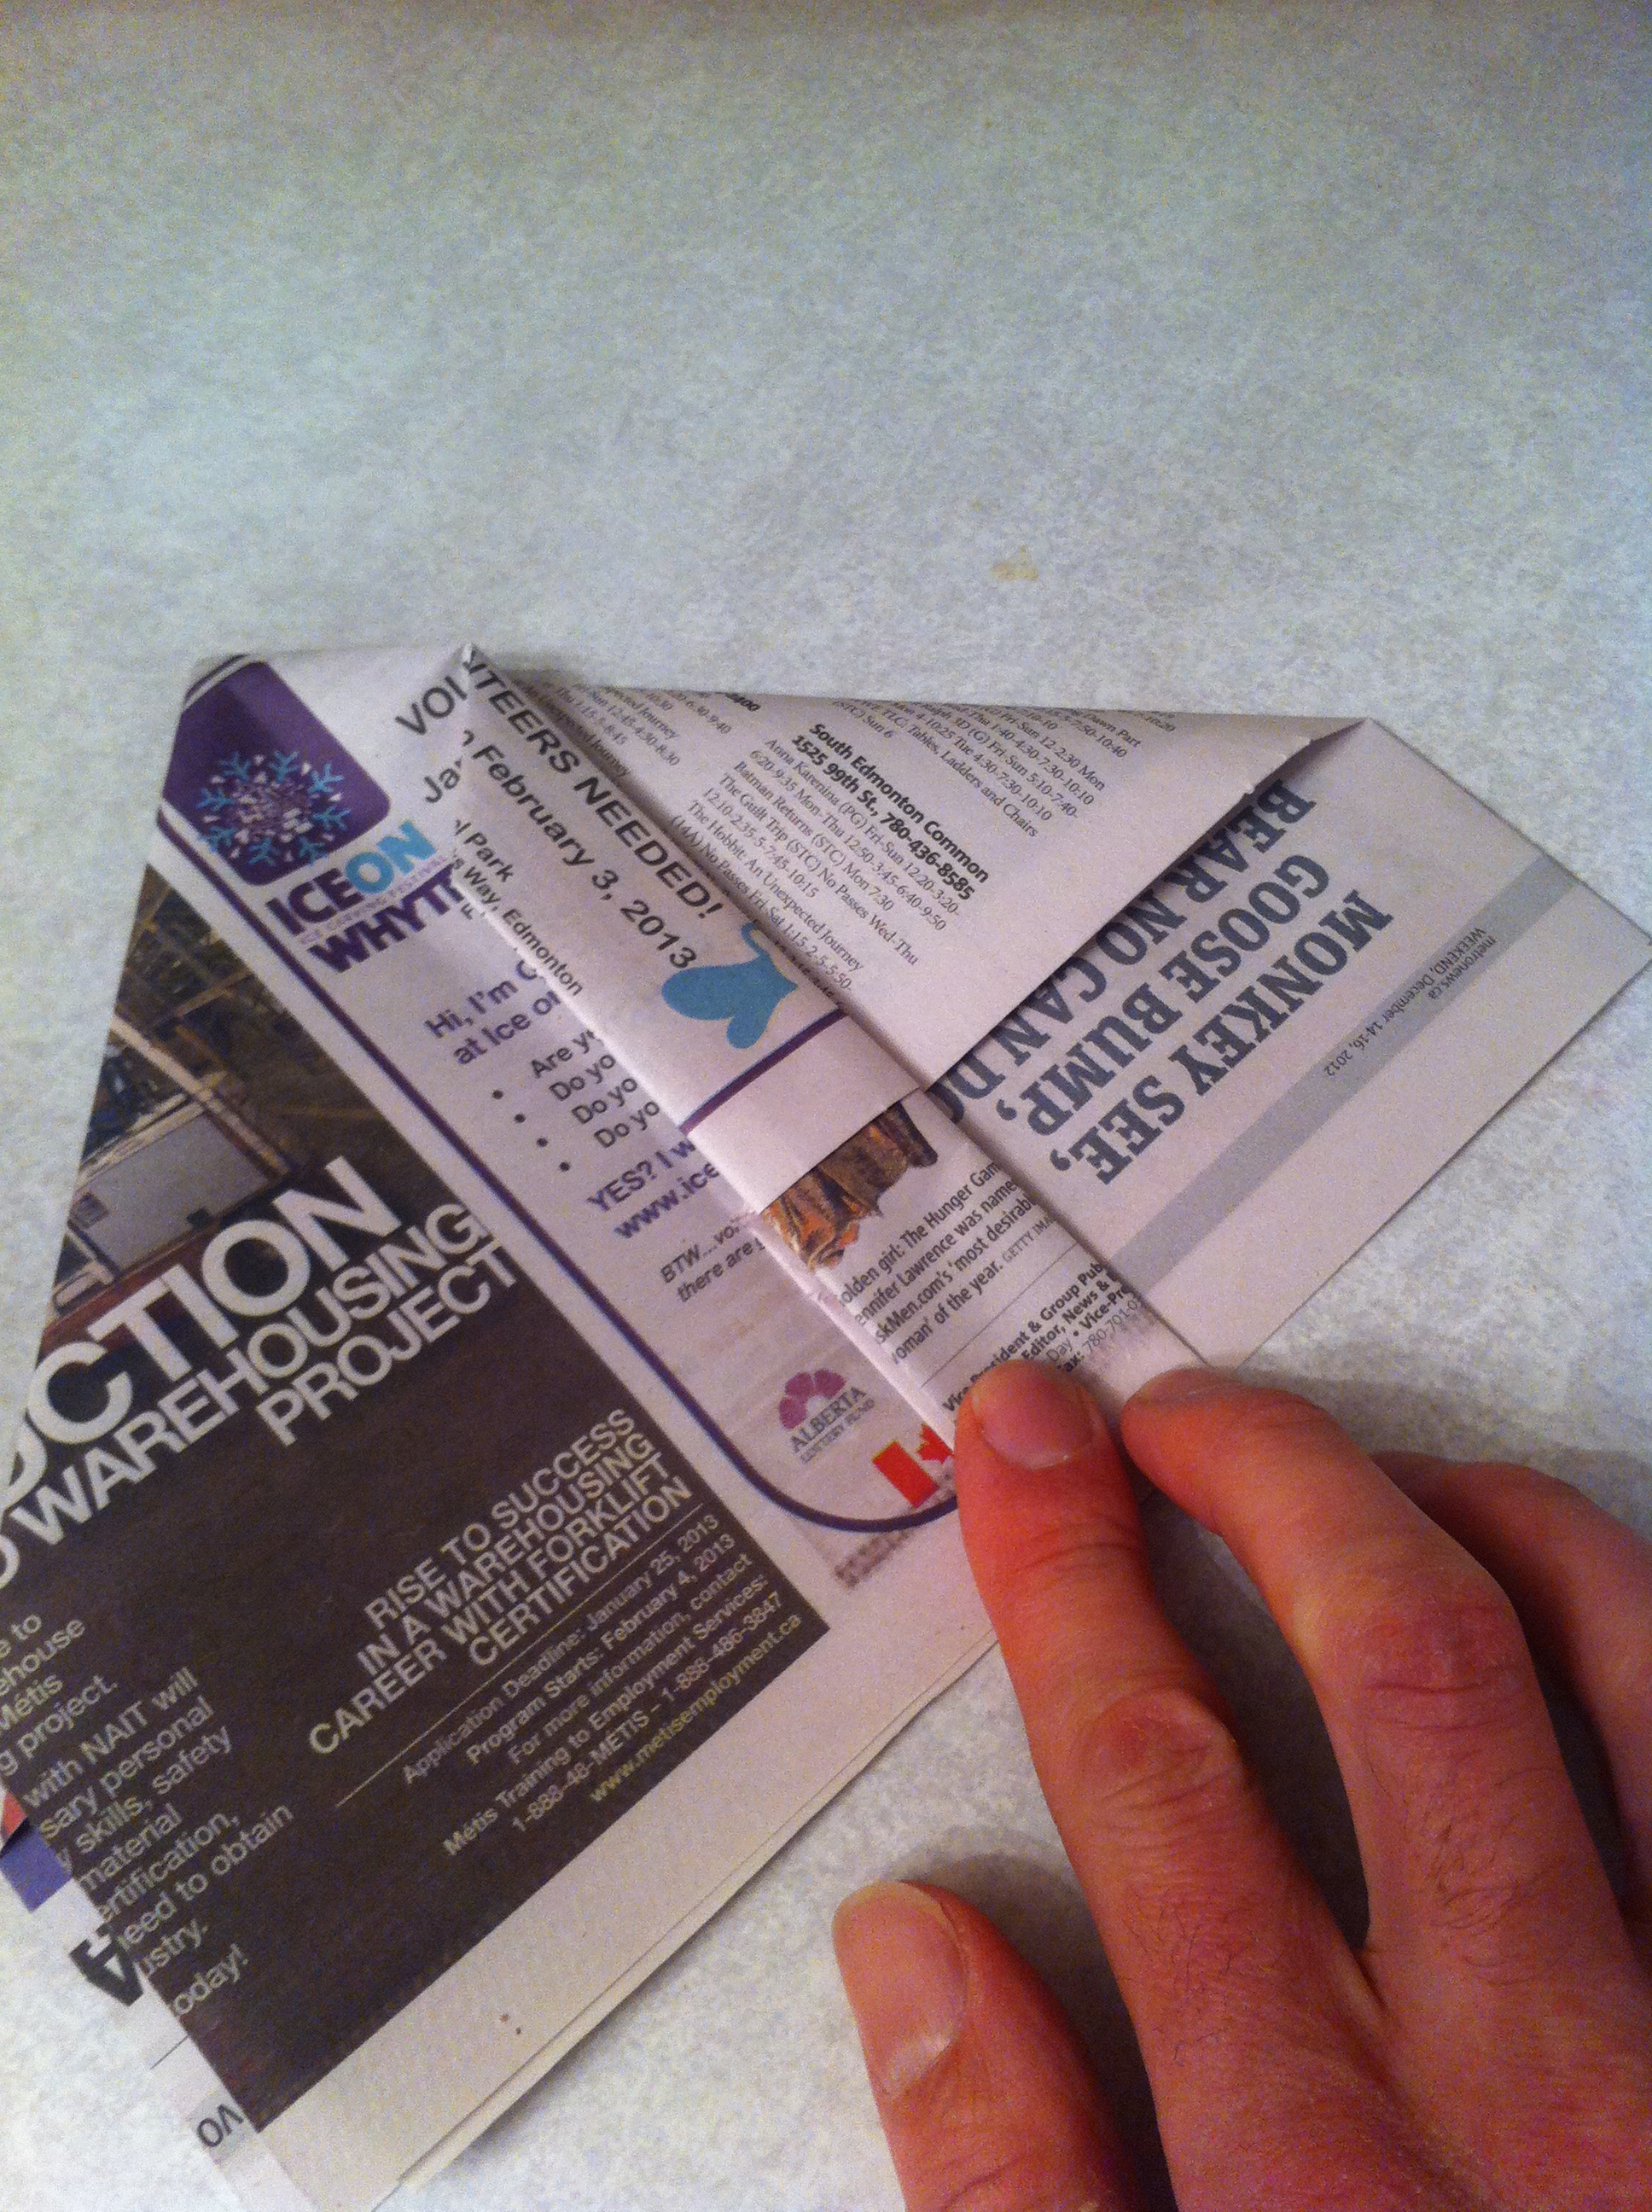
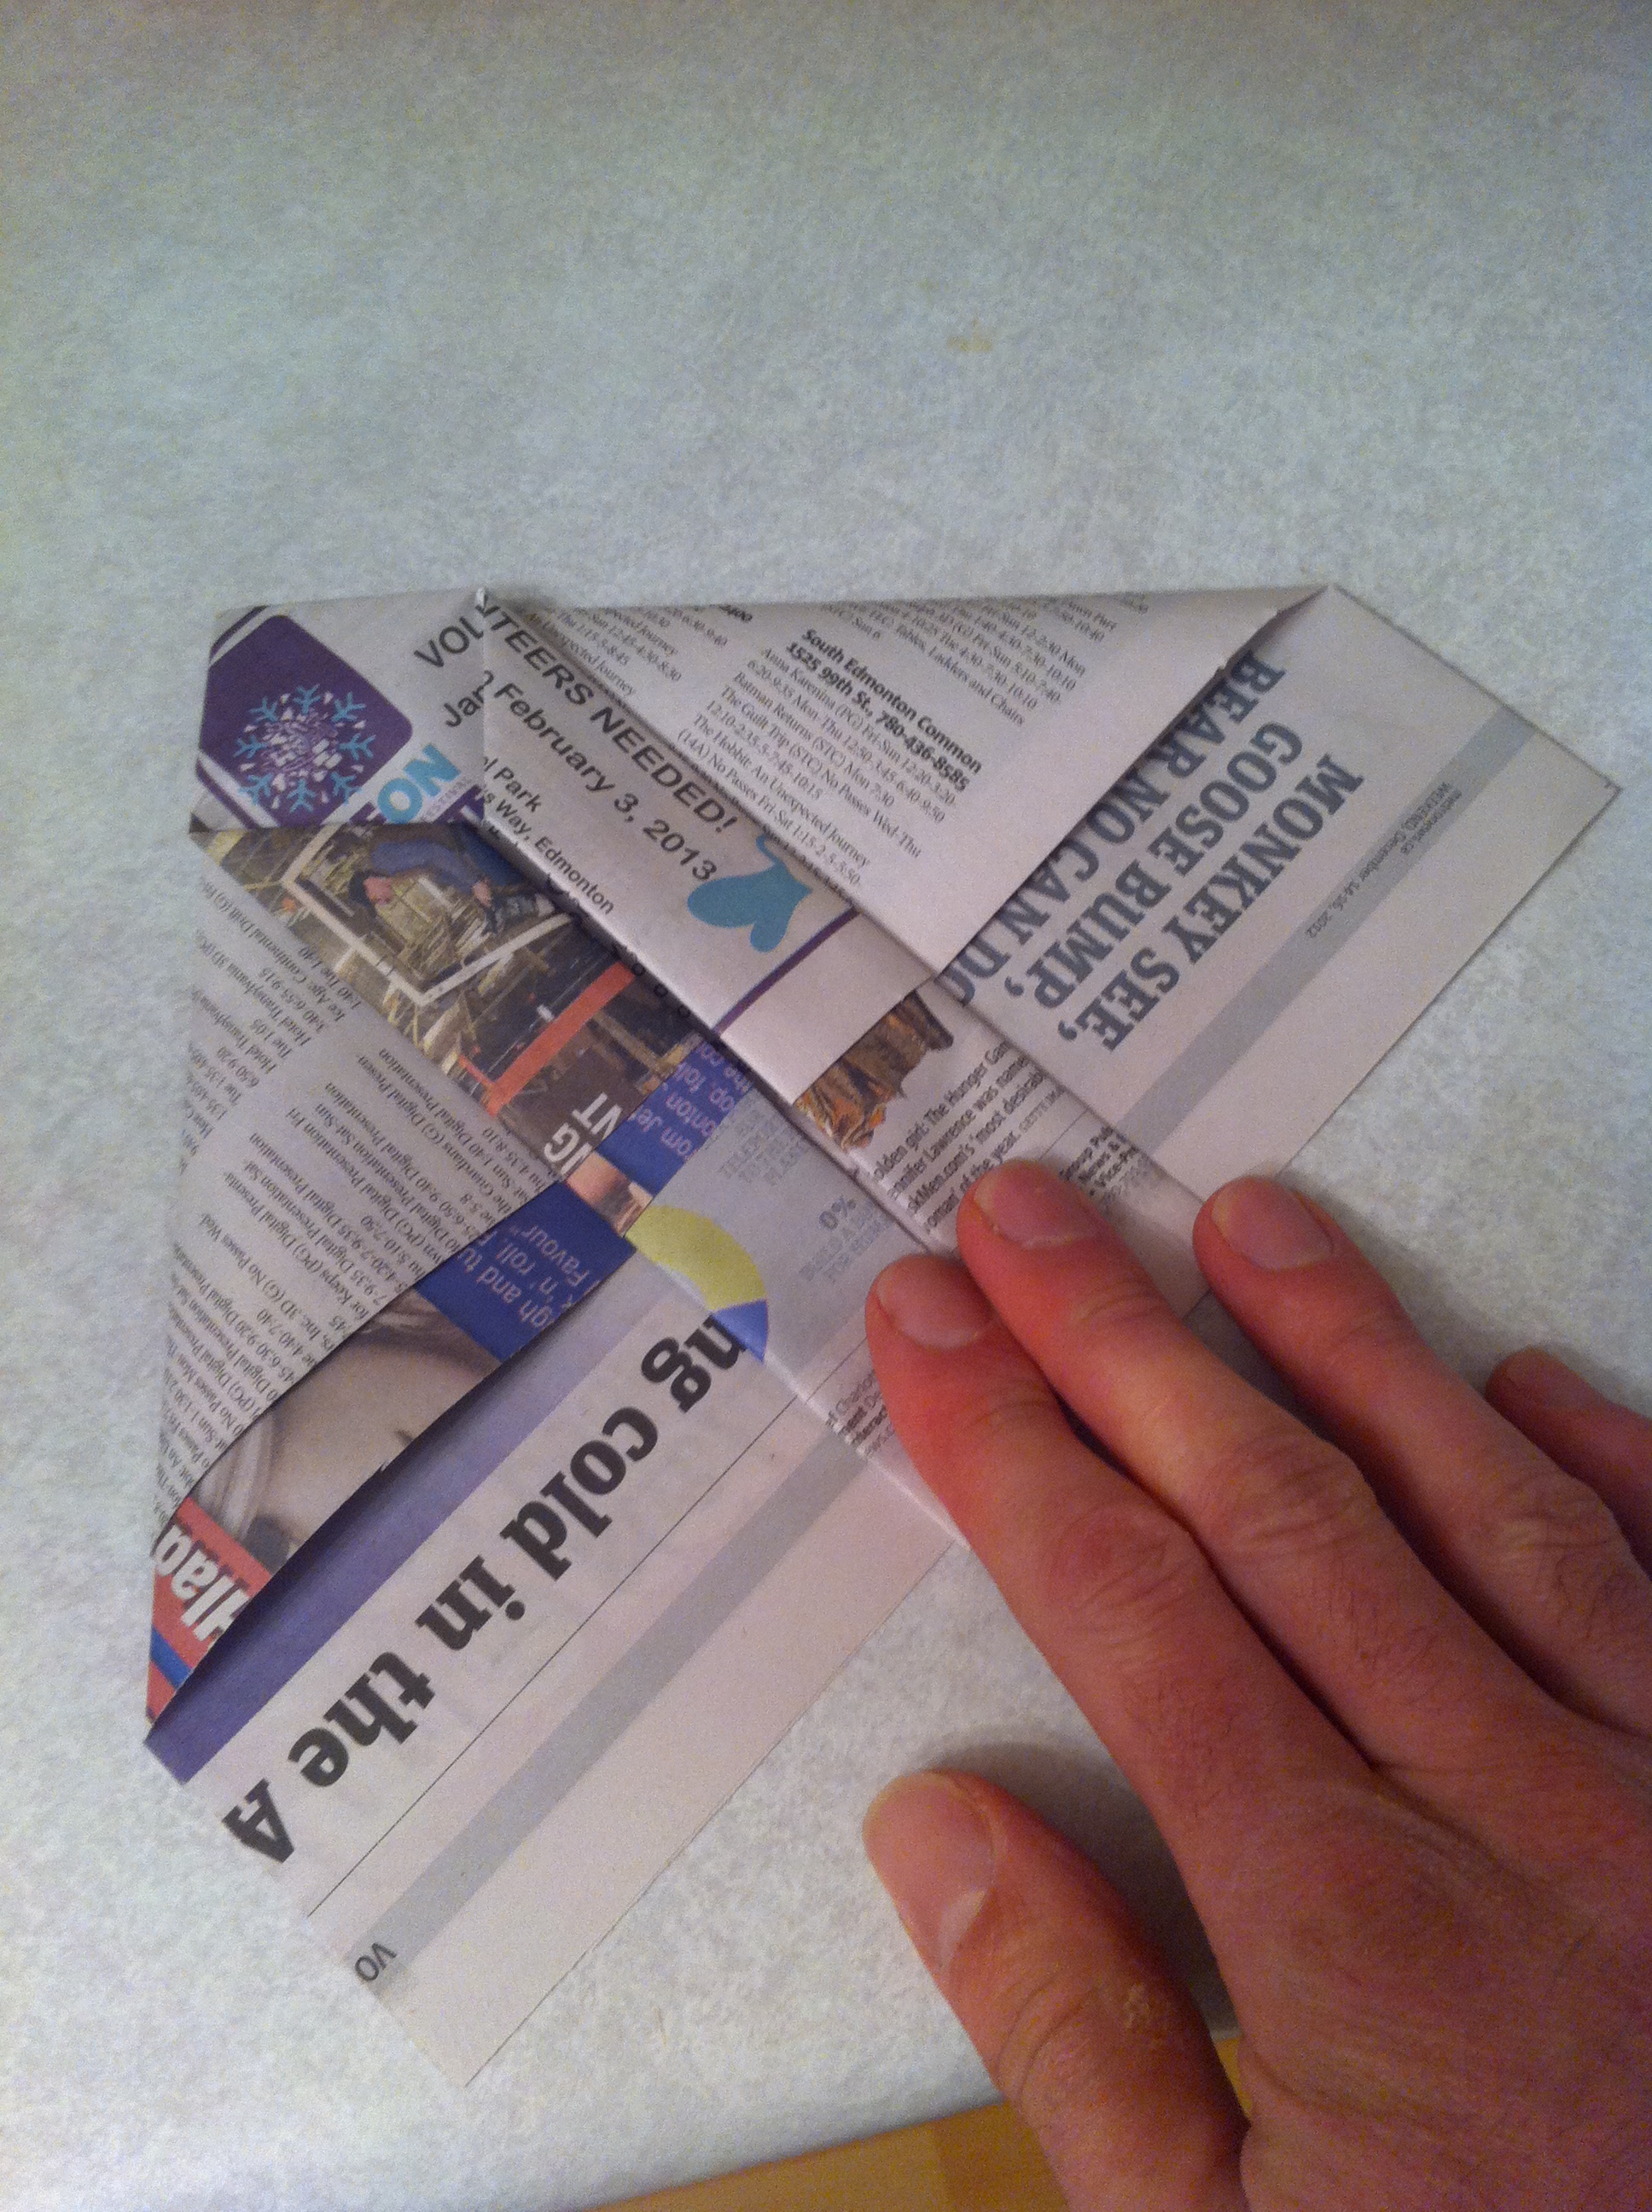
Flip it over and repeat on the other side, so you end up with this:
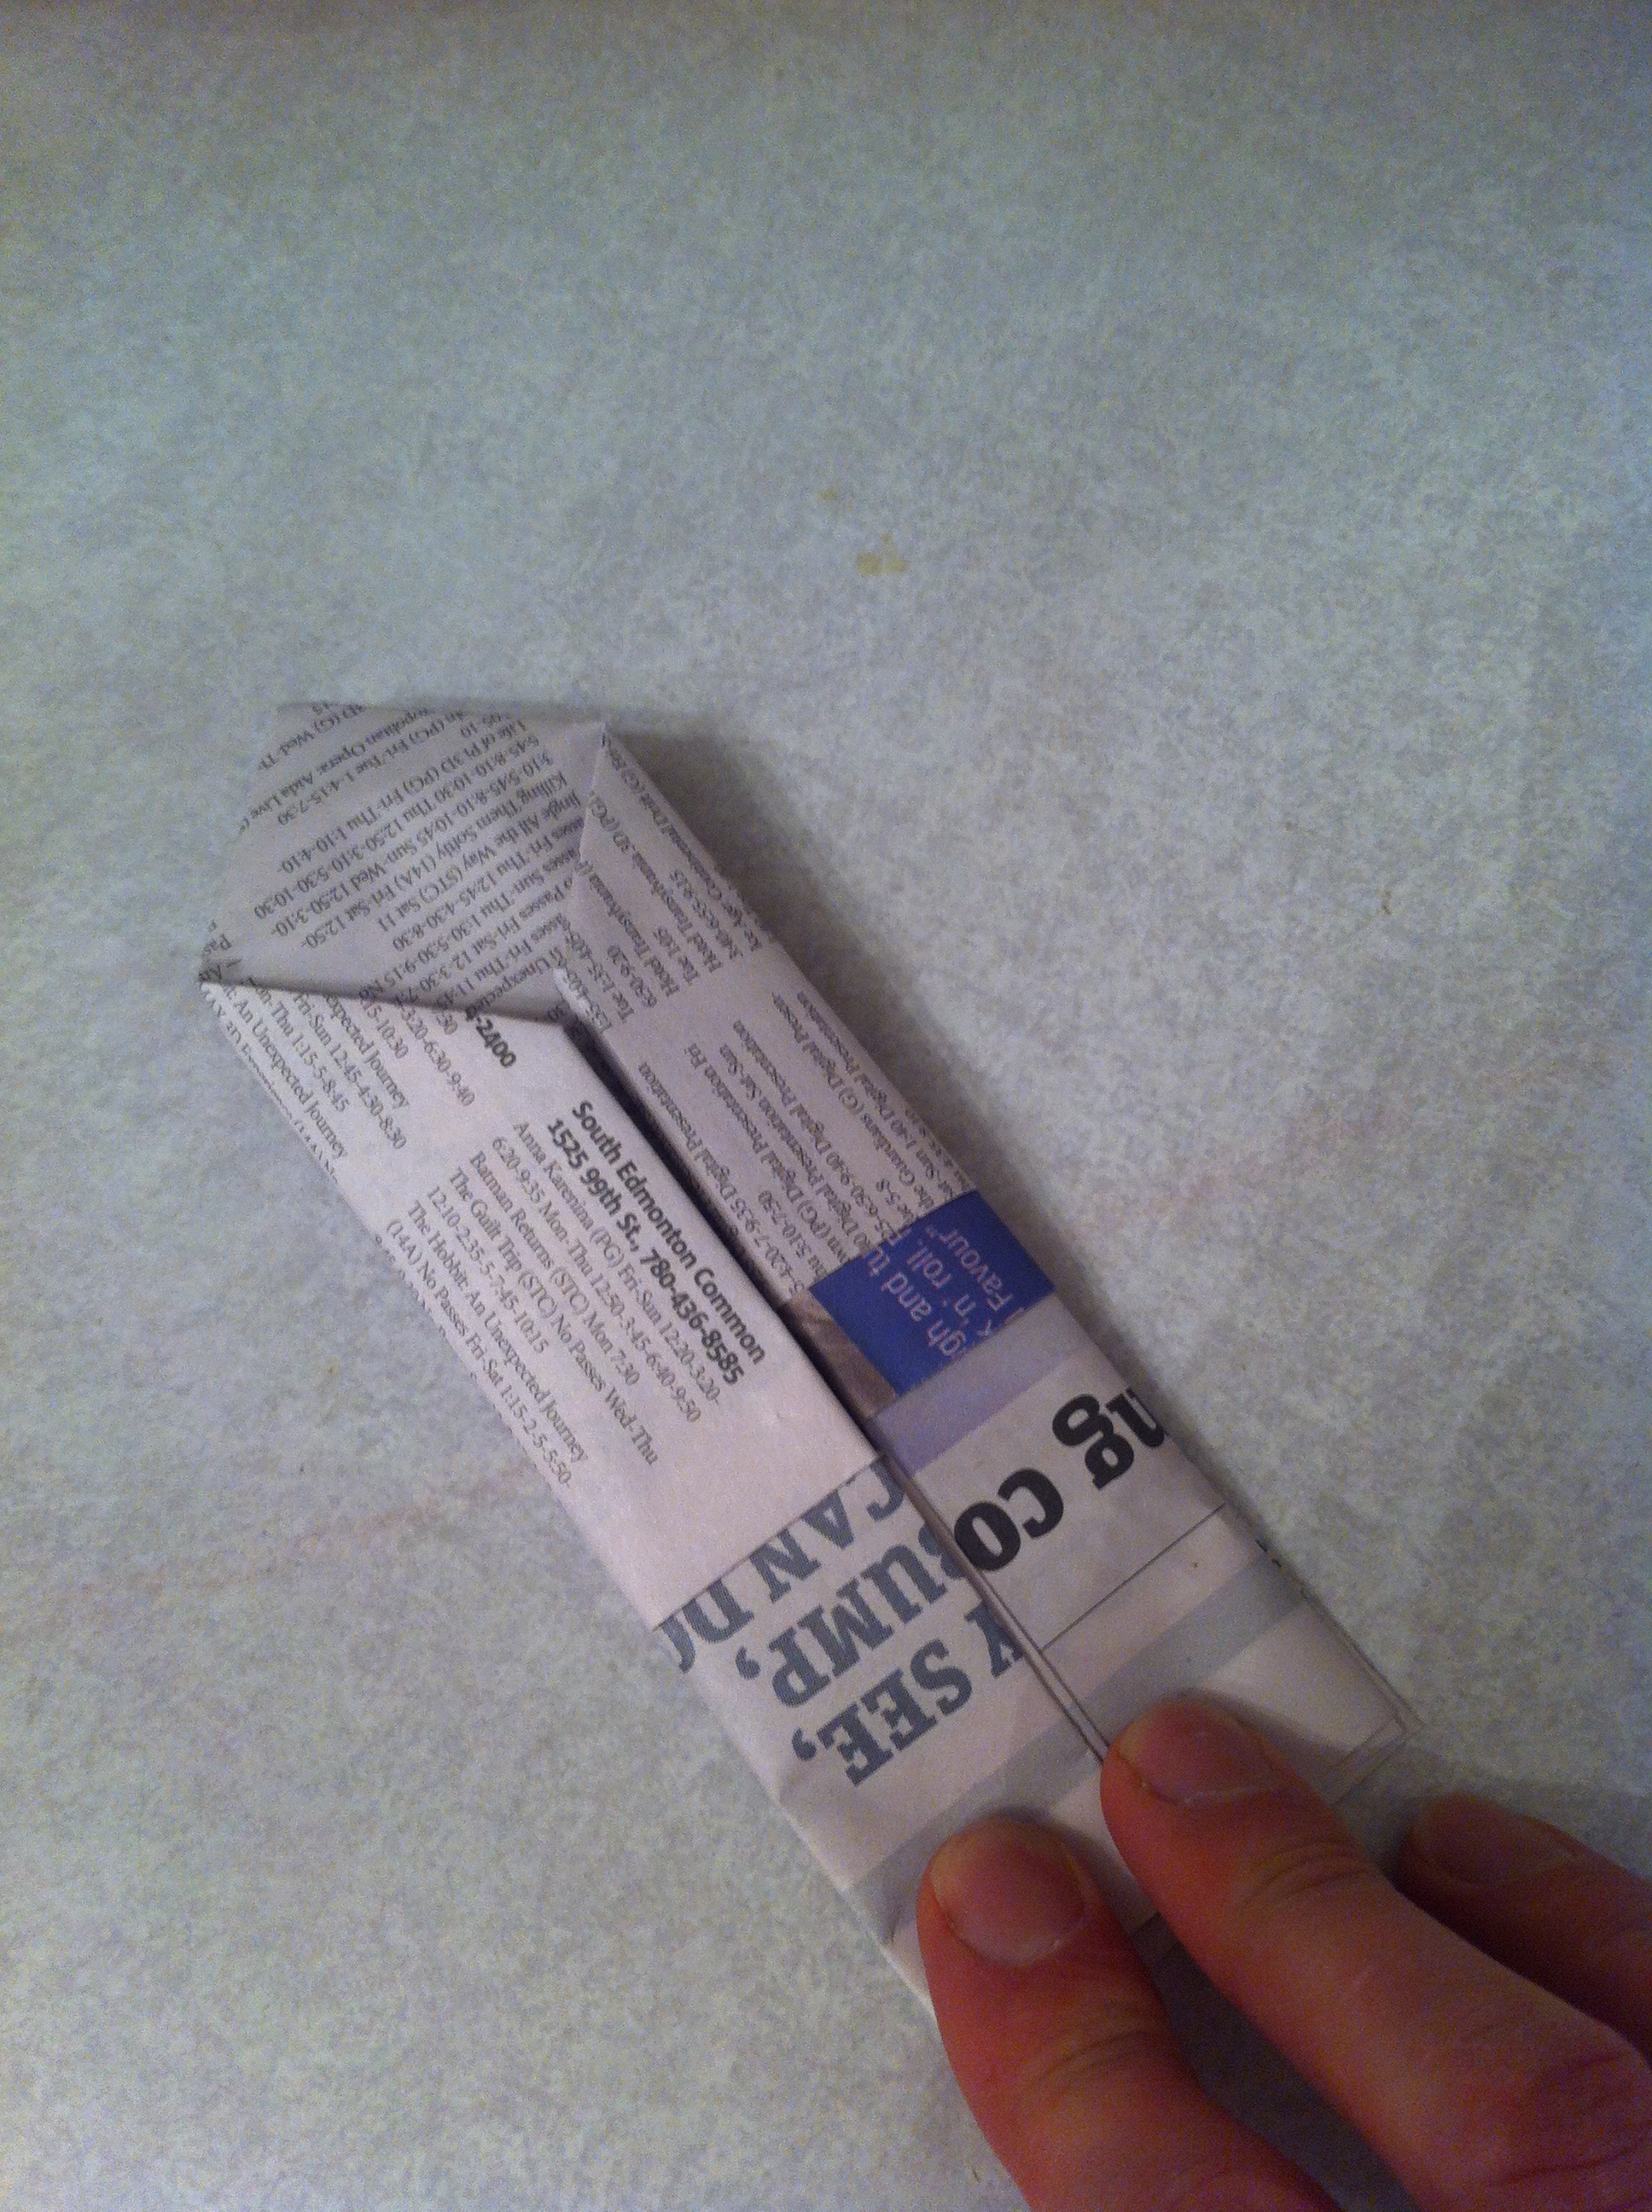
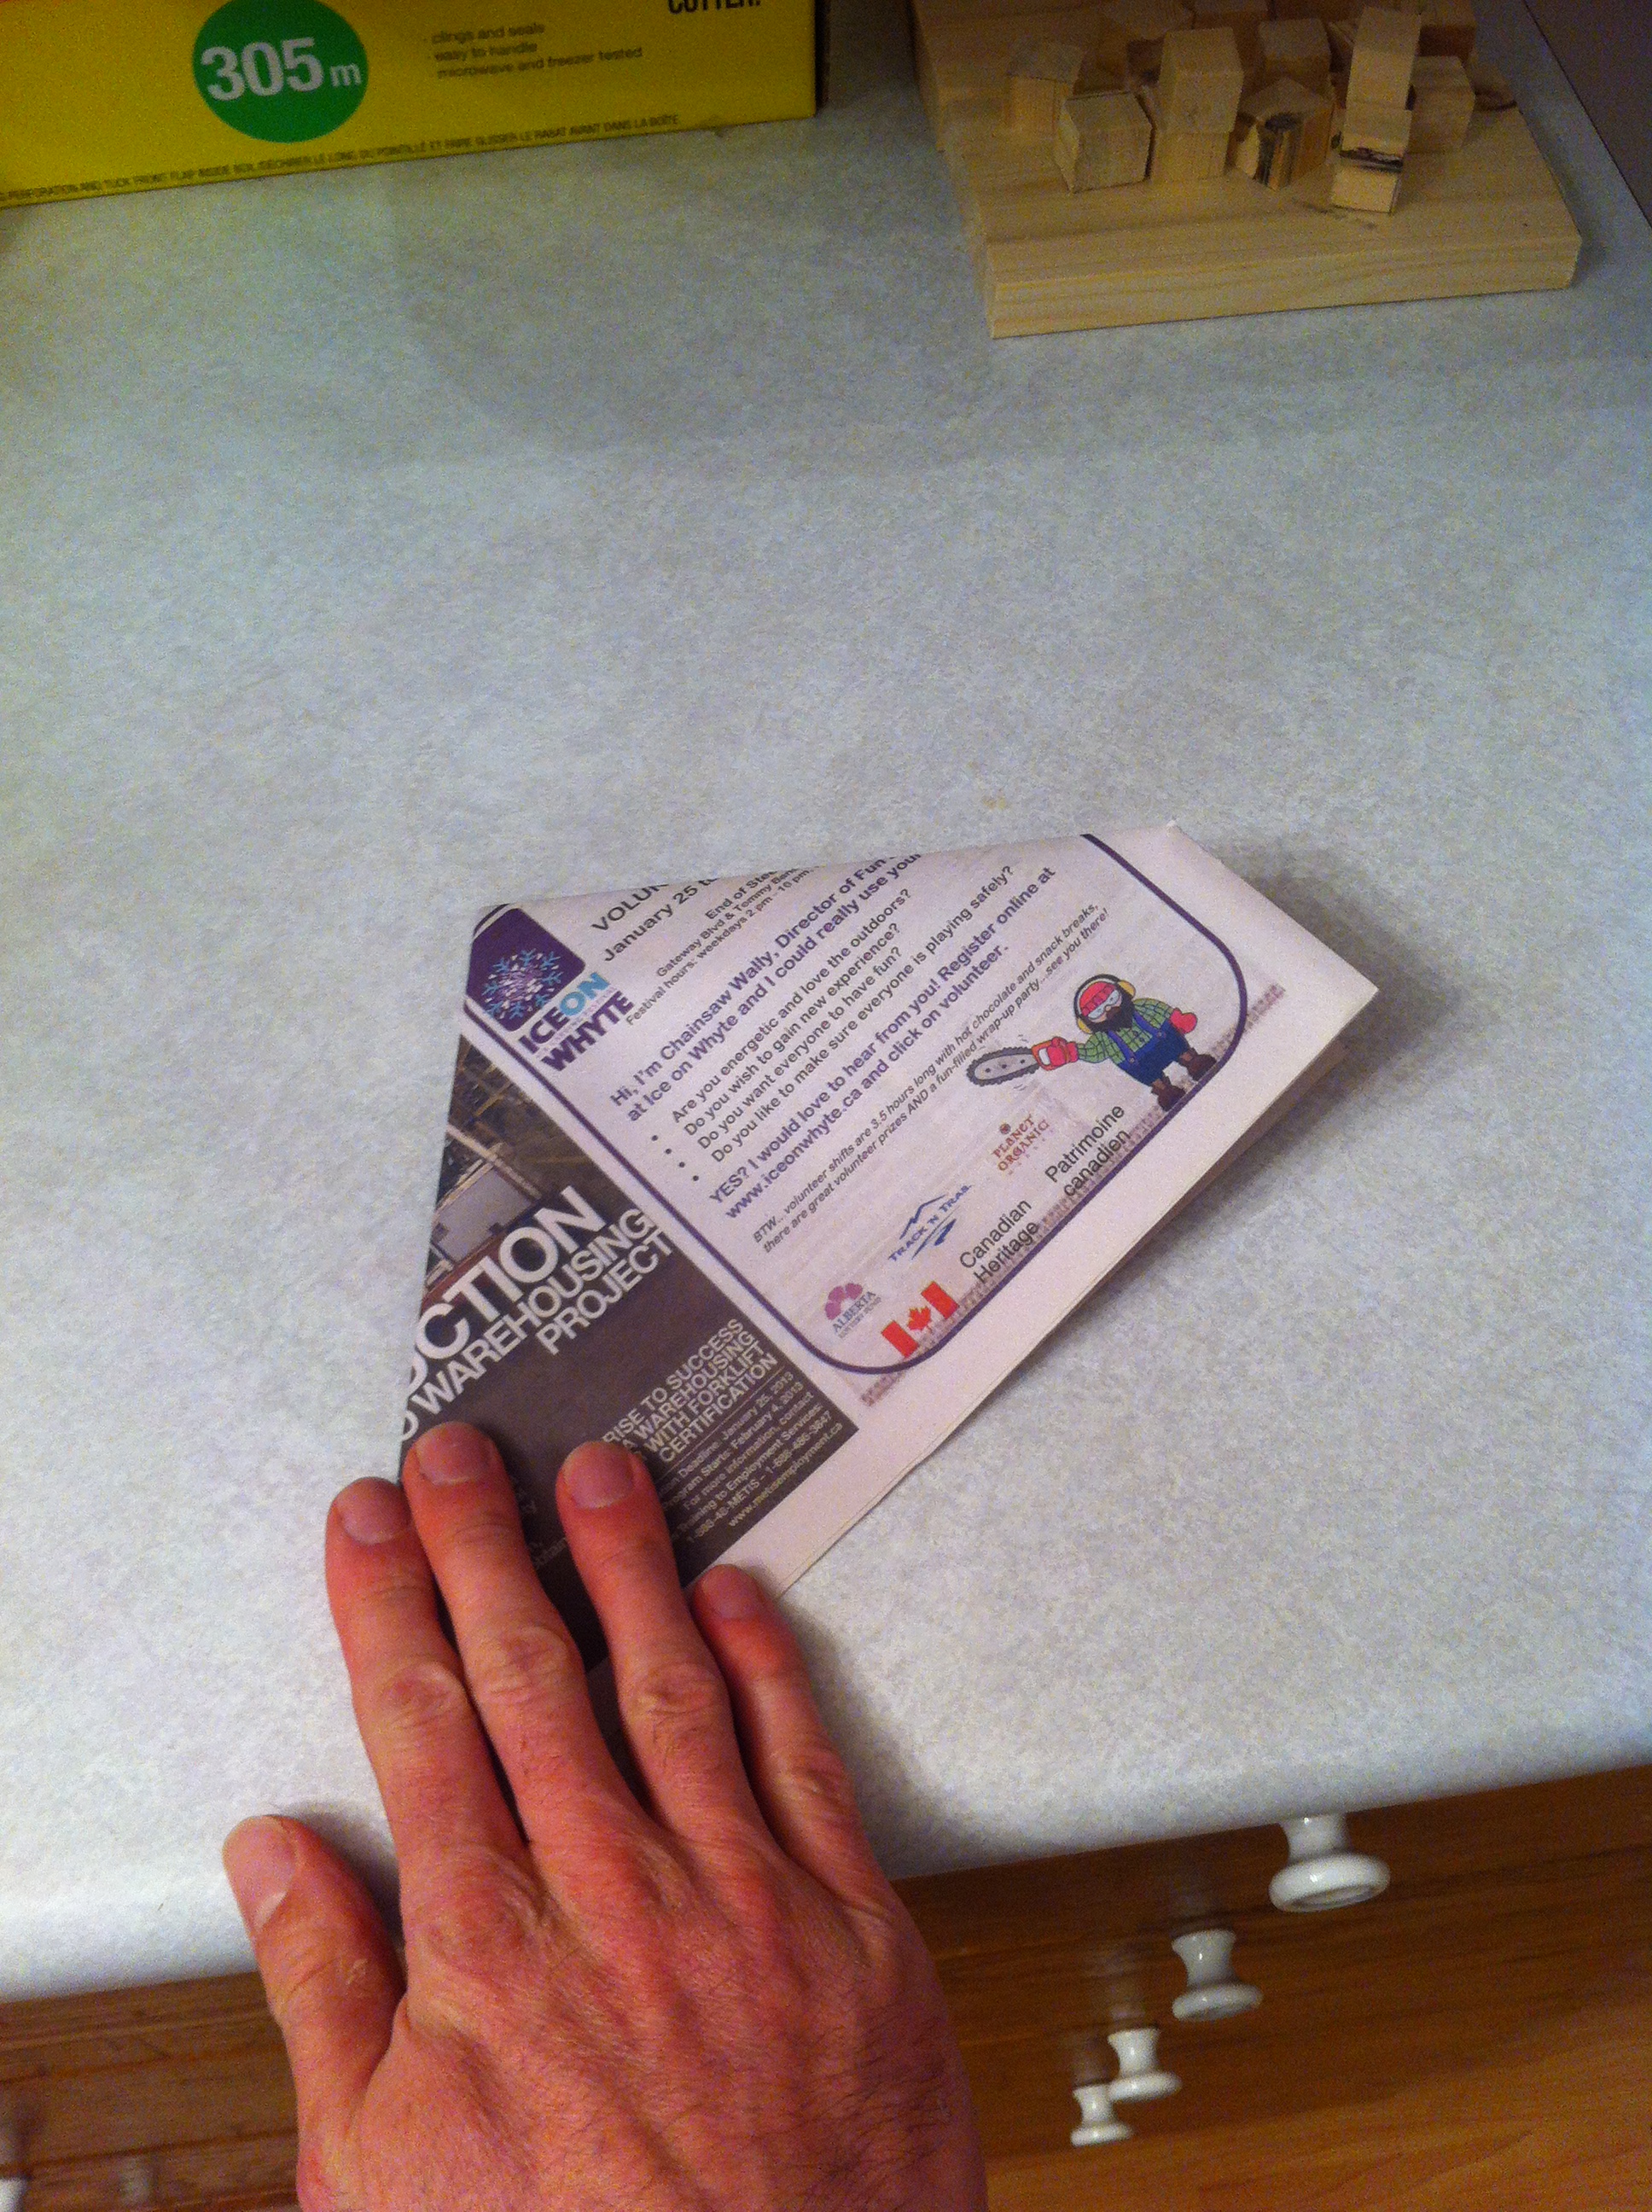
Pick it up and pinch it closed while you fold down the top flaps:

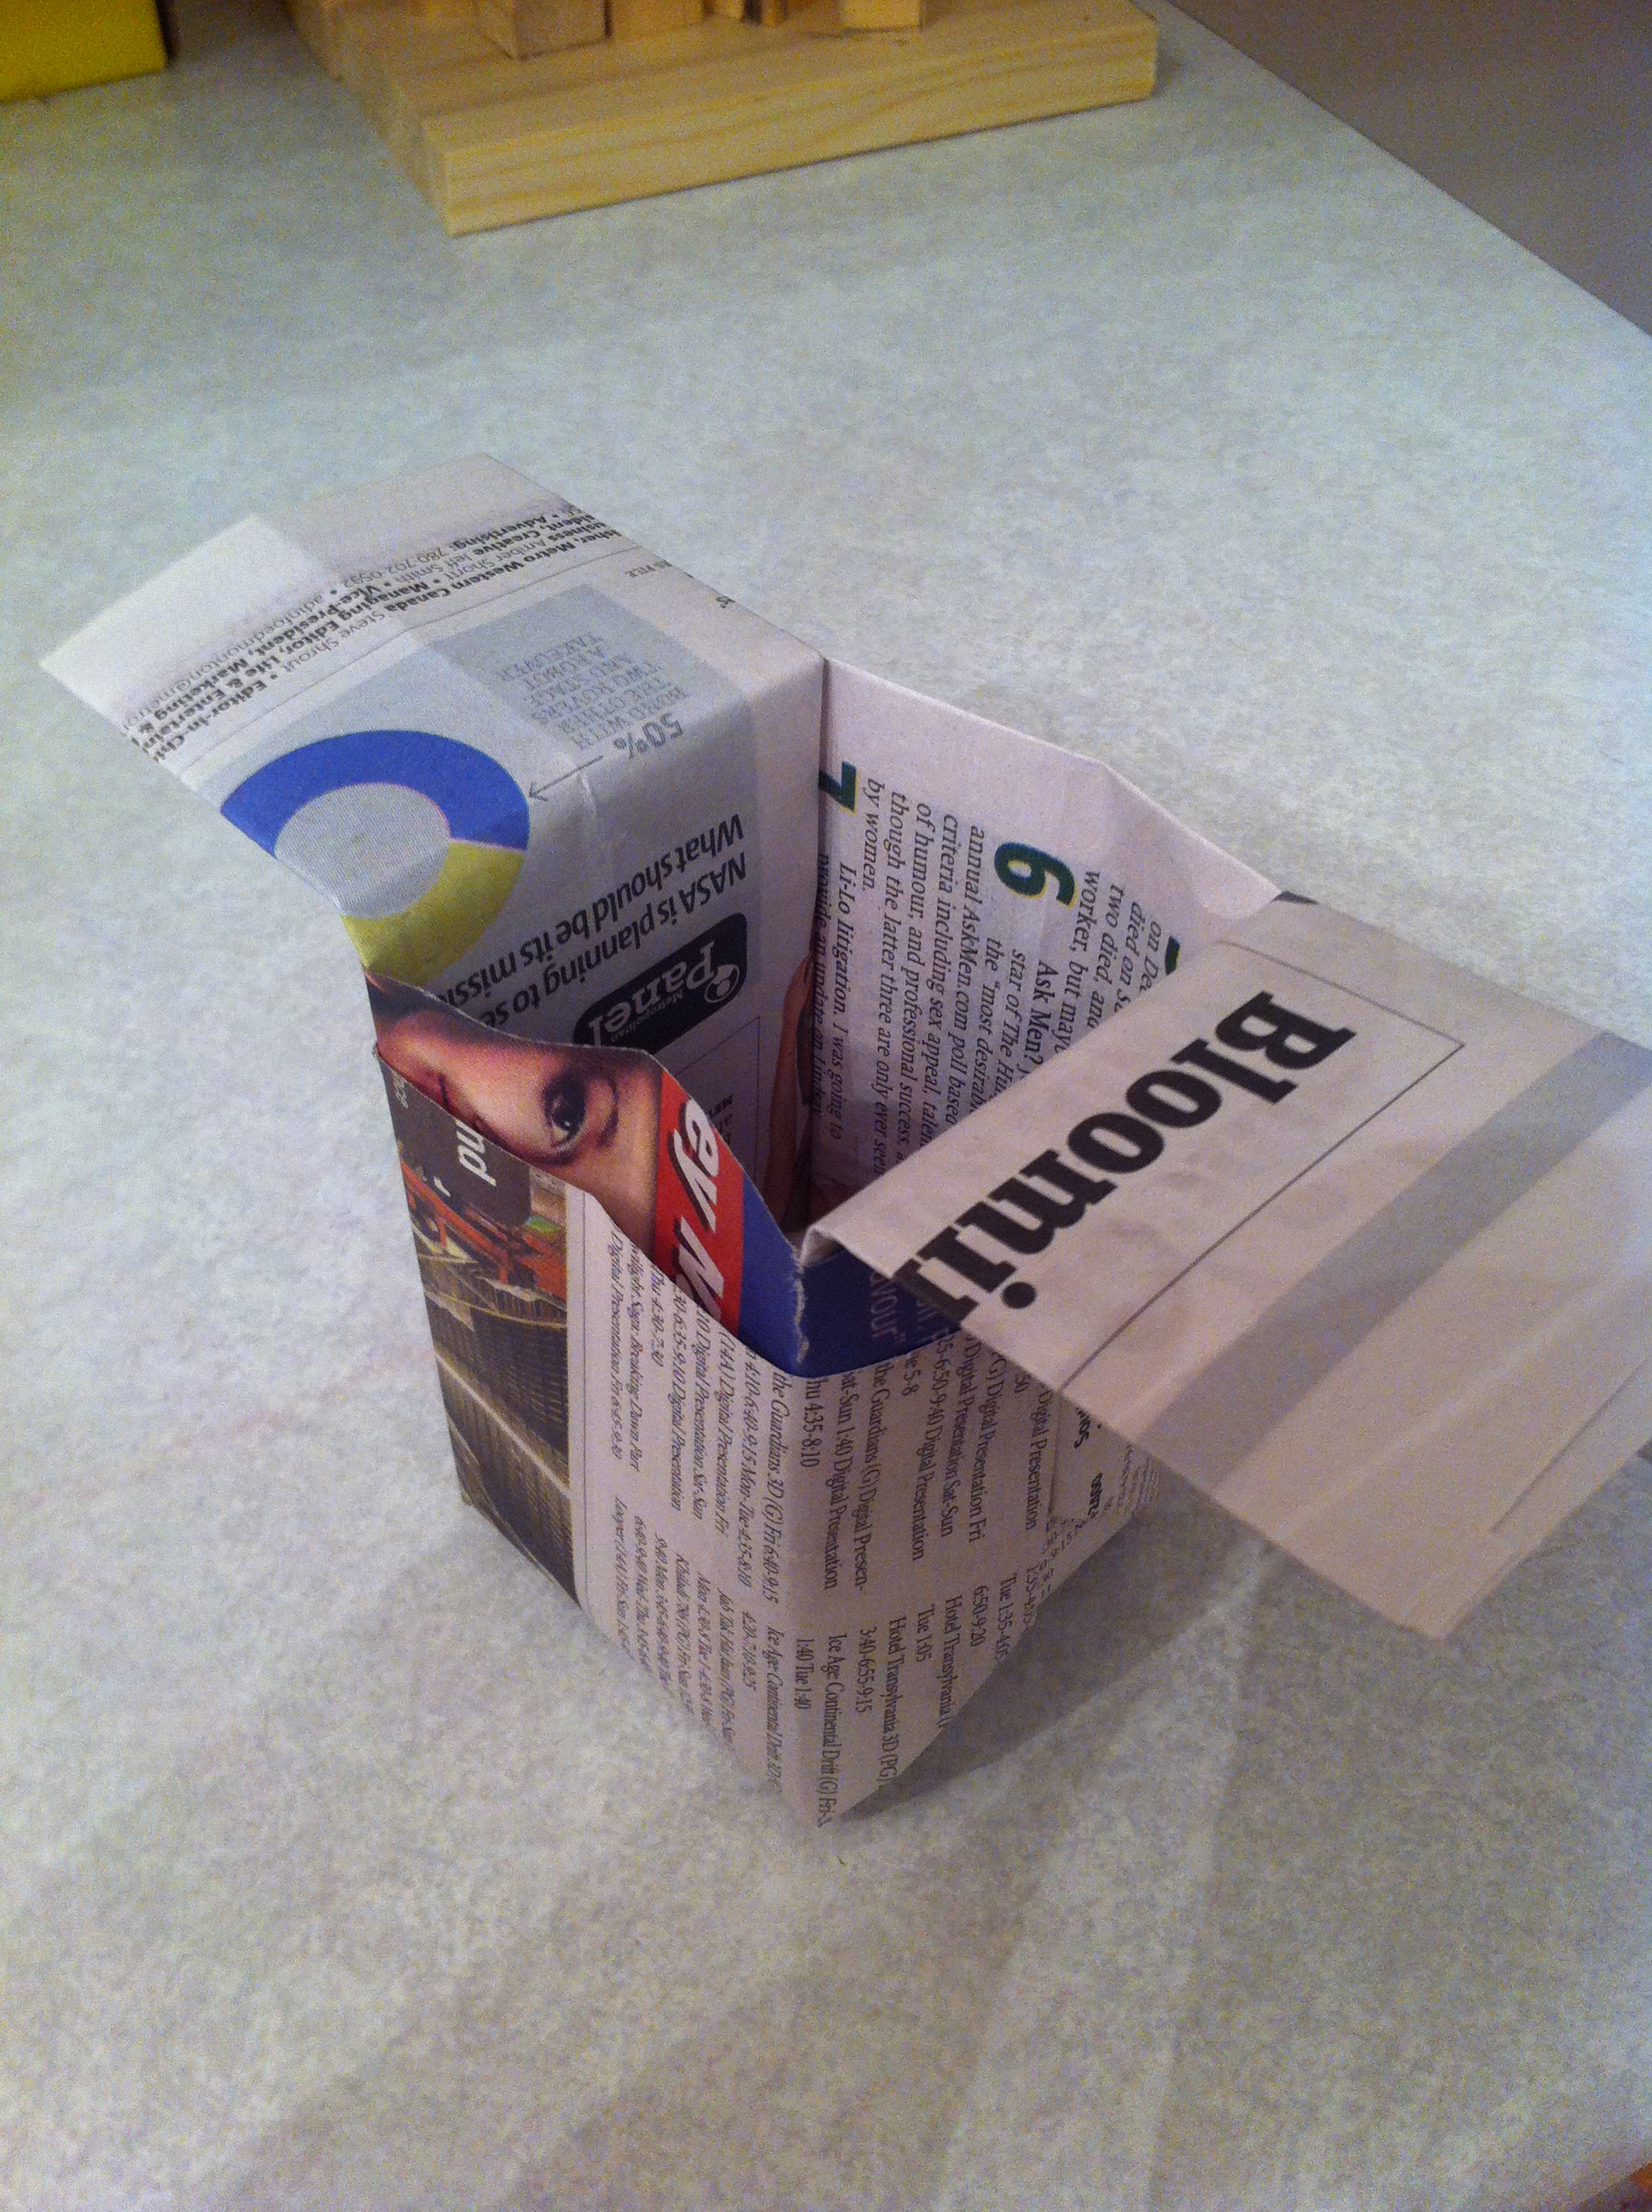
And now gently open it up, and you have a pot for a seedling:
I make these in batches. They wrap themselves nicely in bundles of ten, like so:

Well, I make a few more than that, actually!
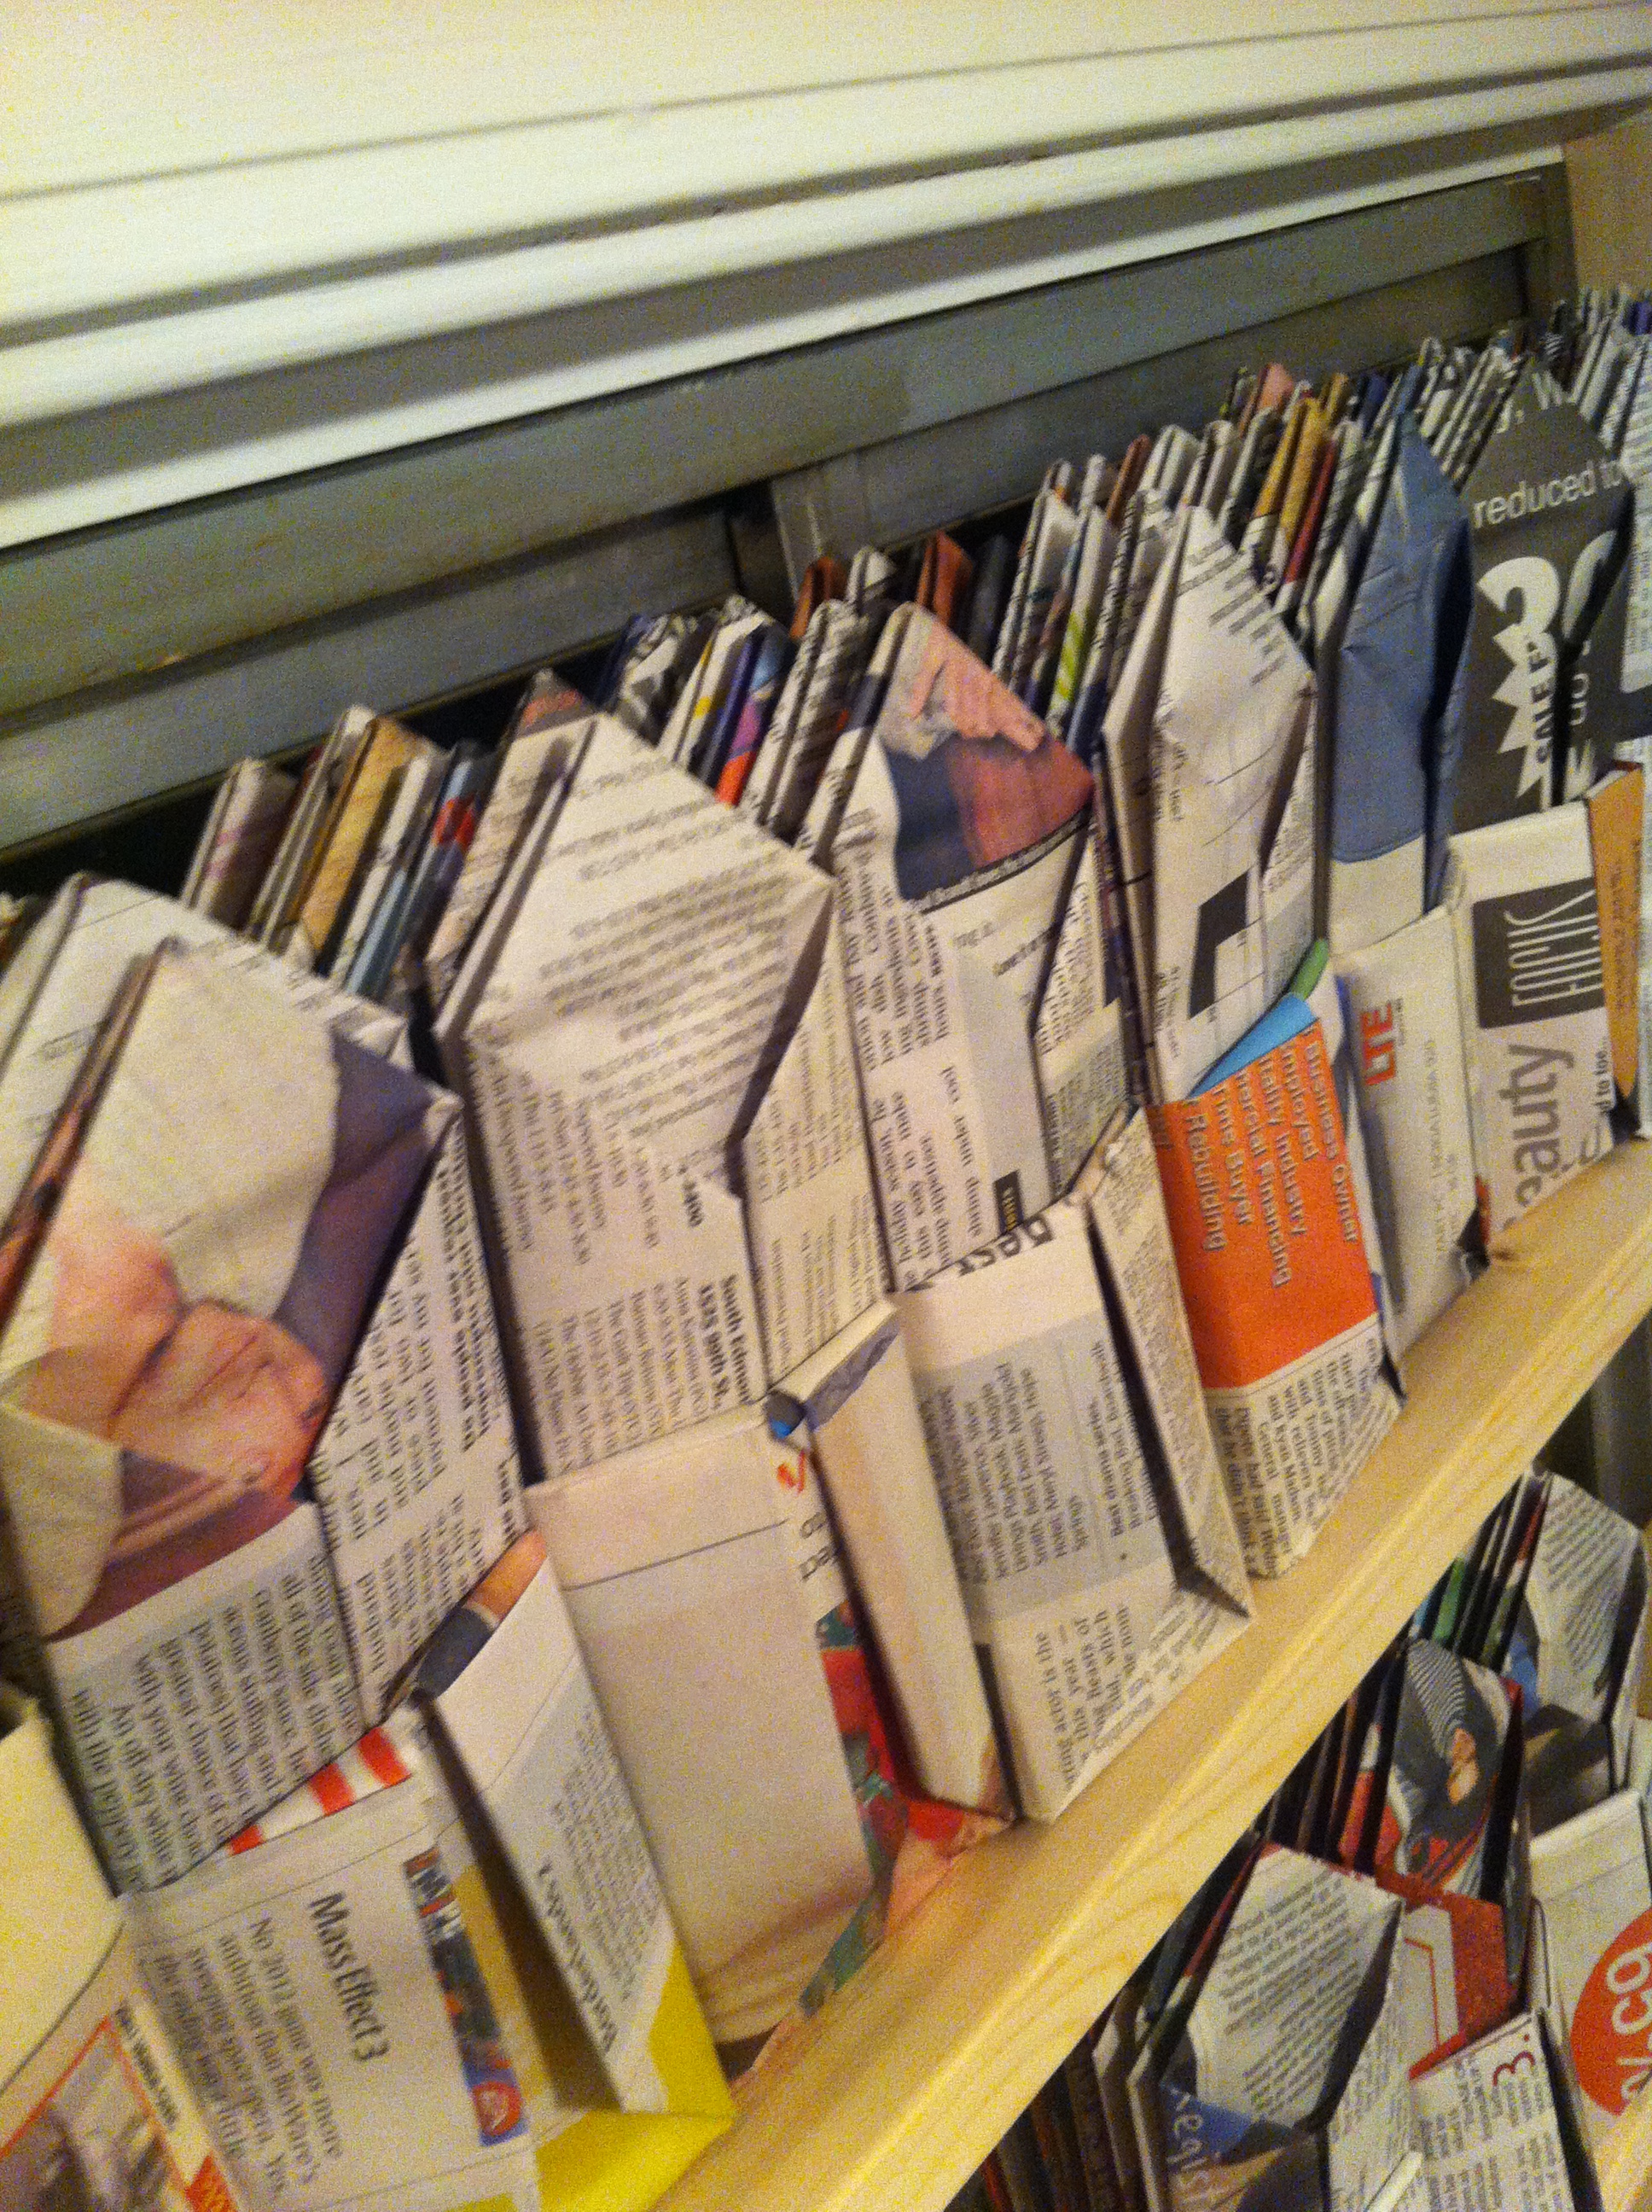
Hey, I didn’t build those shelves for decoration, you know!
A few notes: because they are wicking paper fibre, these pots can dry out quite quickly once the seedlings form a good root ball, so keep an eye on them. You may also want to plant the seeds in plastic trays to begin with for the same reason, but I have grown strong tomato and peppers seedlings by sowing them directly. However, at the beginning, you are more likely to have a problem with too much water, so I recommend that you poke a small drainage hole in the bottom of them as you plant.
When you plant your seedlings out, you can either peel the paper off entirely, or just take off the bottom. In either case, you will disturb the root ball a lot less than you would by pulling a seedling out of a plastic pot.
Happy folding!
Building Natural Light Shelves for a Small Space
I love winter as much as anyone. Skiing, skating, and tobogganing keep me going through the deep cold and long nights. But it is awfully long in this corner of the world, so what’s a gardener to do – I mean other than the annual browsing of the seed catalogues, hot drink in hand?
Here’s an idea – how about growing your own seedlings? You can save yourself a bit of money and get your fix of dirt in the warmth of your own home! Not only that, but if you buy the seeds from a reputable place (I suggest mail order from Vesey’s or Stokes) you know exactly what you are getting.
Seedlings need a lot of light. My place is small and I have only two (also small) south-facing windows, so the first thing to do is to build some shelves to fit them.
Step 1: Find a window. Here’s a likely looking spot:
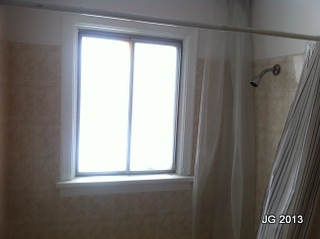
All that juicy light, plus the steam from the shower? My future seedlings are smiling already!
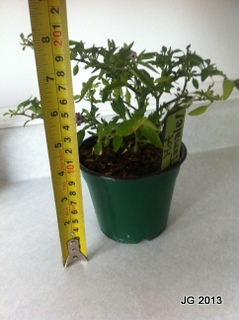
Step 2: Decide how big the shelves should be. This little pepper plant (don’t we hope all our seedlings look half as healthy?) seems to suggest that 8 inches would be a very reasonable size. That gives us room for four shelves.
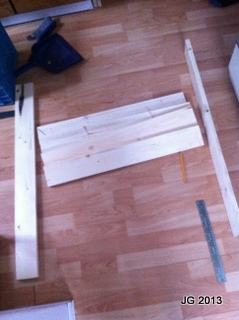
Step 3: Gather the materials. In this case, that’s a pair of 8′ 1″x4″ planks. Cost: $7. Oh, and a 1.5″ screw. You’ll want a screw.
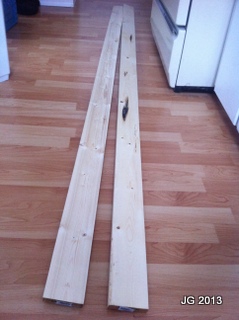
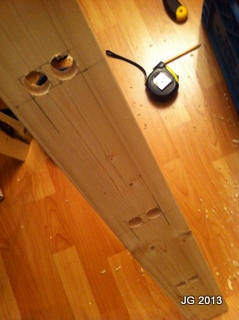
Step 4: Cut your shelves. The basic design is two planks on the side to support the weight, with four shelves going across. They will be held in place by tabs in the shelves fitted into slots in the sides. This is known as a mortise and tenon joint. Plan carefully to use the wood best for the dimensions of your window. You want it to fit the window fairly snugly, but leave a bit of room for error. Maybe a quarter inch. In my case, I cut one 35.5″ side and two 27″ shelves per plank.
Step 5: Cut the tenons (tabs): Measure this very carefully. You will want the tabs to be just the depth of the wood they are going to slot into. I just cut these with a hand saw.
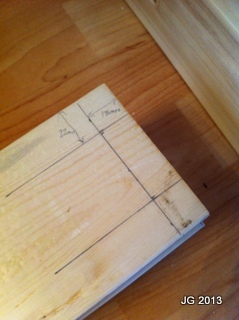
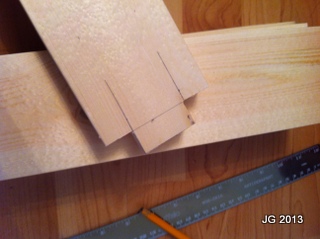
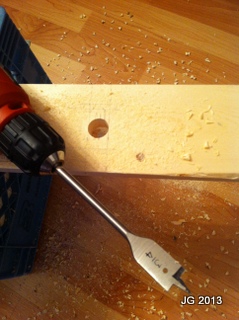
Step 6: Cut the slots (mortises?). This is trickier. I used a 3/4″ spade bit to carefully cut two holes at each end of the slot, and then cut out the corners with a jigsaw. Be careful to account for the width of the wood when you are measuring!
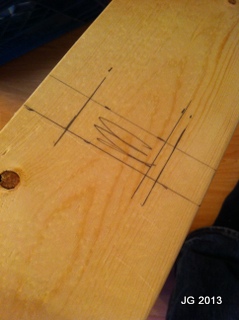

You probably can’t see it from this picture, but I gave the top shelf an extra inch and a half because it gets the least light (the window frame shades it somewhat).
Step 7: The bottom is a special case. If you have a level windowsill, you don’t really need to do this, but mine slopes in a weird way, so I put a shelf at the bottom and pinned it in place with a bit of doweling.

Step 8: Put it all together, fit it in the window, and pin the top of one of the sides to the window frame with the screw so it doesn’t fall out. Just a quarter inch will do. The landlord won’t mind.
Note that by this time, it is dark. Ah, winter!
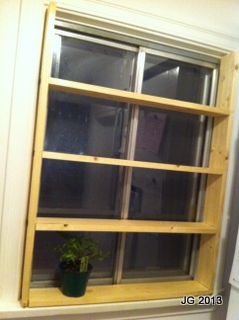
One final thing: because this is all push-fit (i.e. no screws, nails, or glue), once you are done with the shelves, they can be taken apart and stored under your bed, like this:

Happy winter gardening!
Shaw TV on Edmonton’s Community Garden Award Winners — That’s us!
Congratulations Parkallen
Congratulations Parkallen:
The Parkallen Community Garden is the proud winner of the 2012 Edmonton in Bloom Community Garden Award.

We should be very proud that our vision, hard work and community spirit has caught the loving eye of Edmontonians despite that our garden is just one year old! We beat out some very well-established and marvelous community gardens to collect this top award at City Hall.

“Edmonton salutes the Parkallen Community Garden for making our city a beautiful place in which to live and grow.” — Councillor Kim Krushell, City of Edmonton
“One of the newest cg’s, (Parkallen Community Garden’s) story of engagement & education as well as the communal nature of their garden and its design, garnered over 100 votes. Runner up was last year’s winner, Sustain SU Campus Community Garden. (W)e thank the over 635 people who took the time to cast a ballot!” — Sustainable Food Edmonton
